Configuring the Script
Heading over to the Script section in the left sidebar will take you to the page where you can configure script revisions and the script itself.
Script Revisions
The Revisions tab is where you can manage script revisions. The table shows all revisions of the script and allows you to Add, Delete, Edit, or Load a revision.
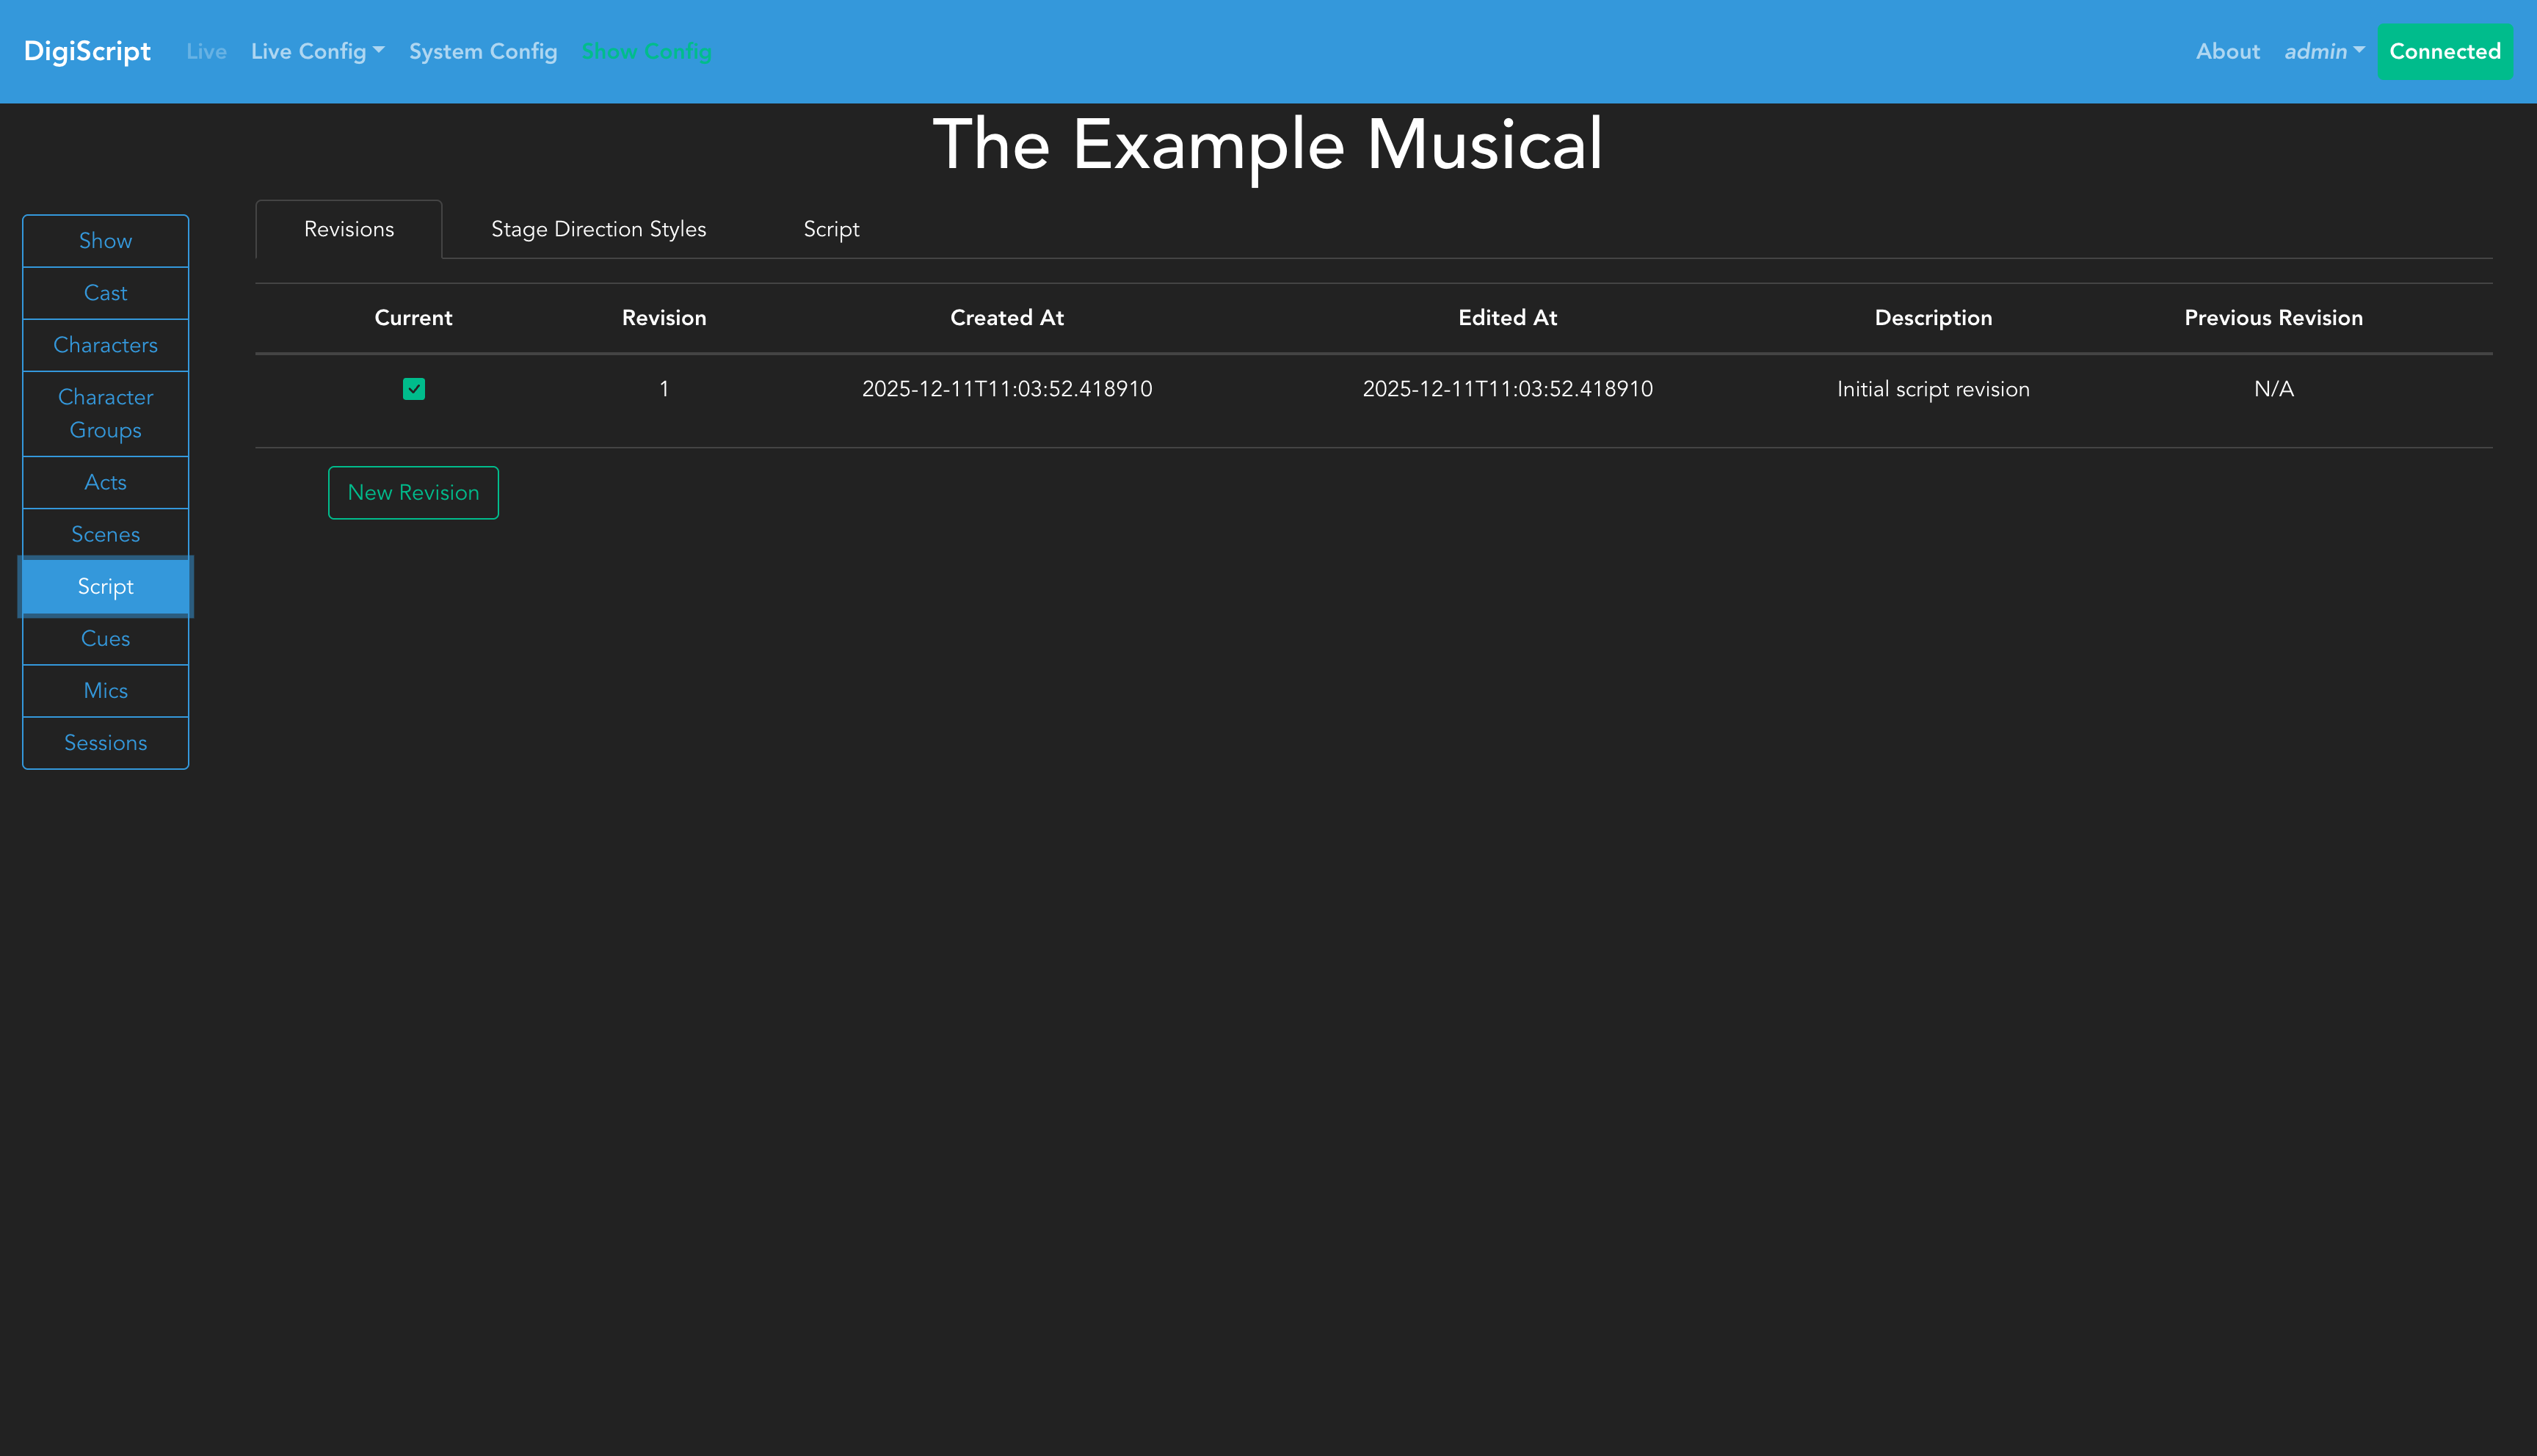
Understanding Script Revisions
Script revisions function similar to version control systems like Git - they track the state of your script at different points in time. This allows you to:
- Roll back the script to a previous version if needed
- Compare what has changed between revisions
- Maintain different versions of the script for different performances
Revision Branch Graph
The Revision Branch Graph provides a visual representation of your script’s revision history, showing how revisions branch and evolve over time.
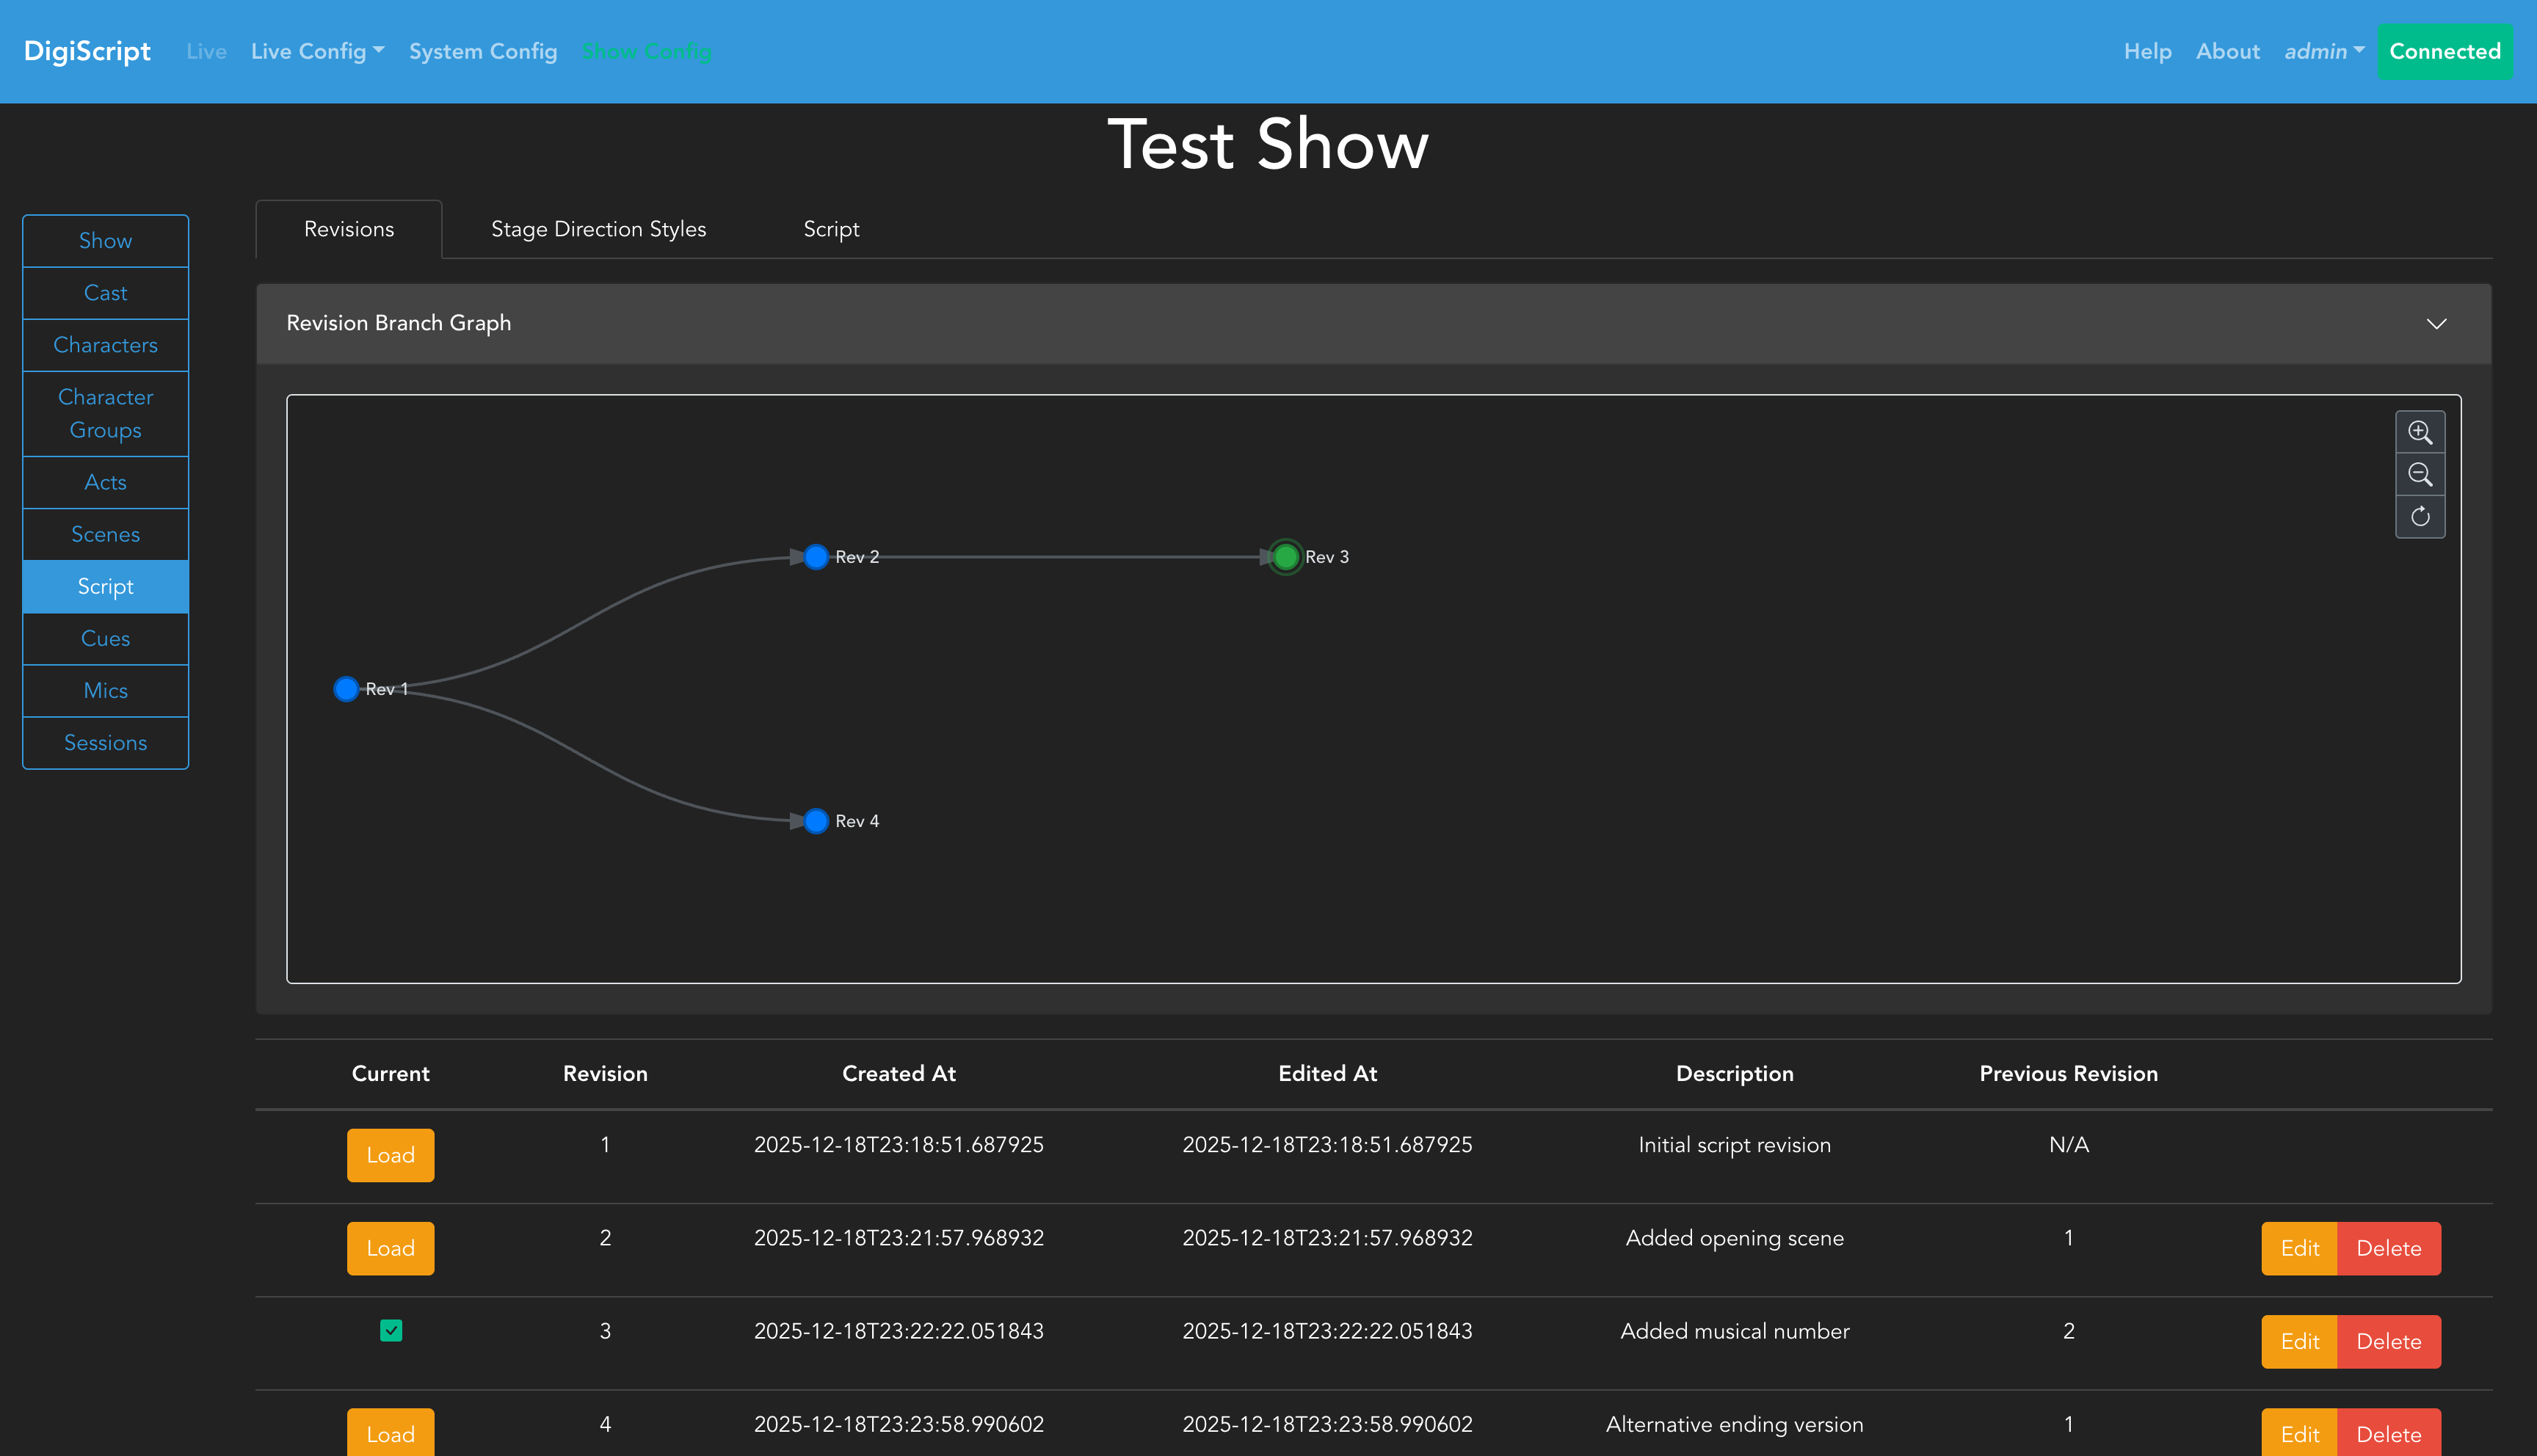
The graph displays:
- Blue nodes: Regular revisions
- Green nodes: The current active revision (with animated pulse effect)
- Lines with arrows: Show the parent-child relationship between revisions
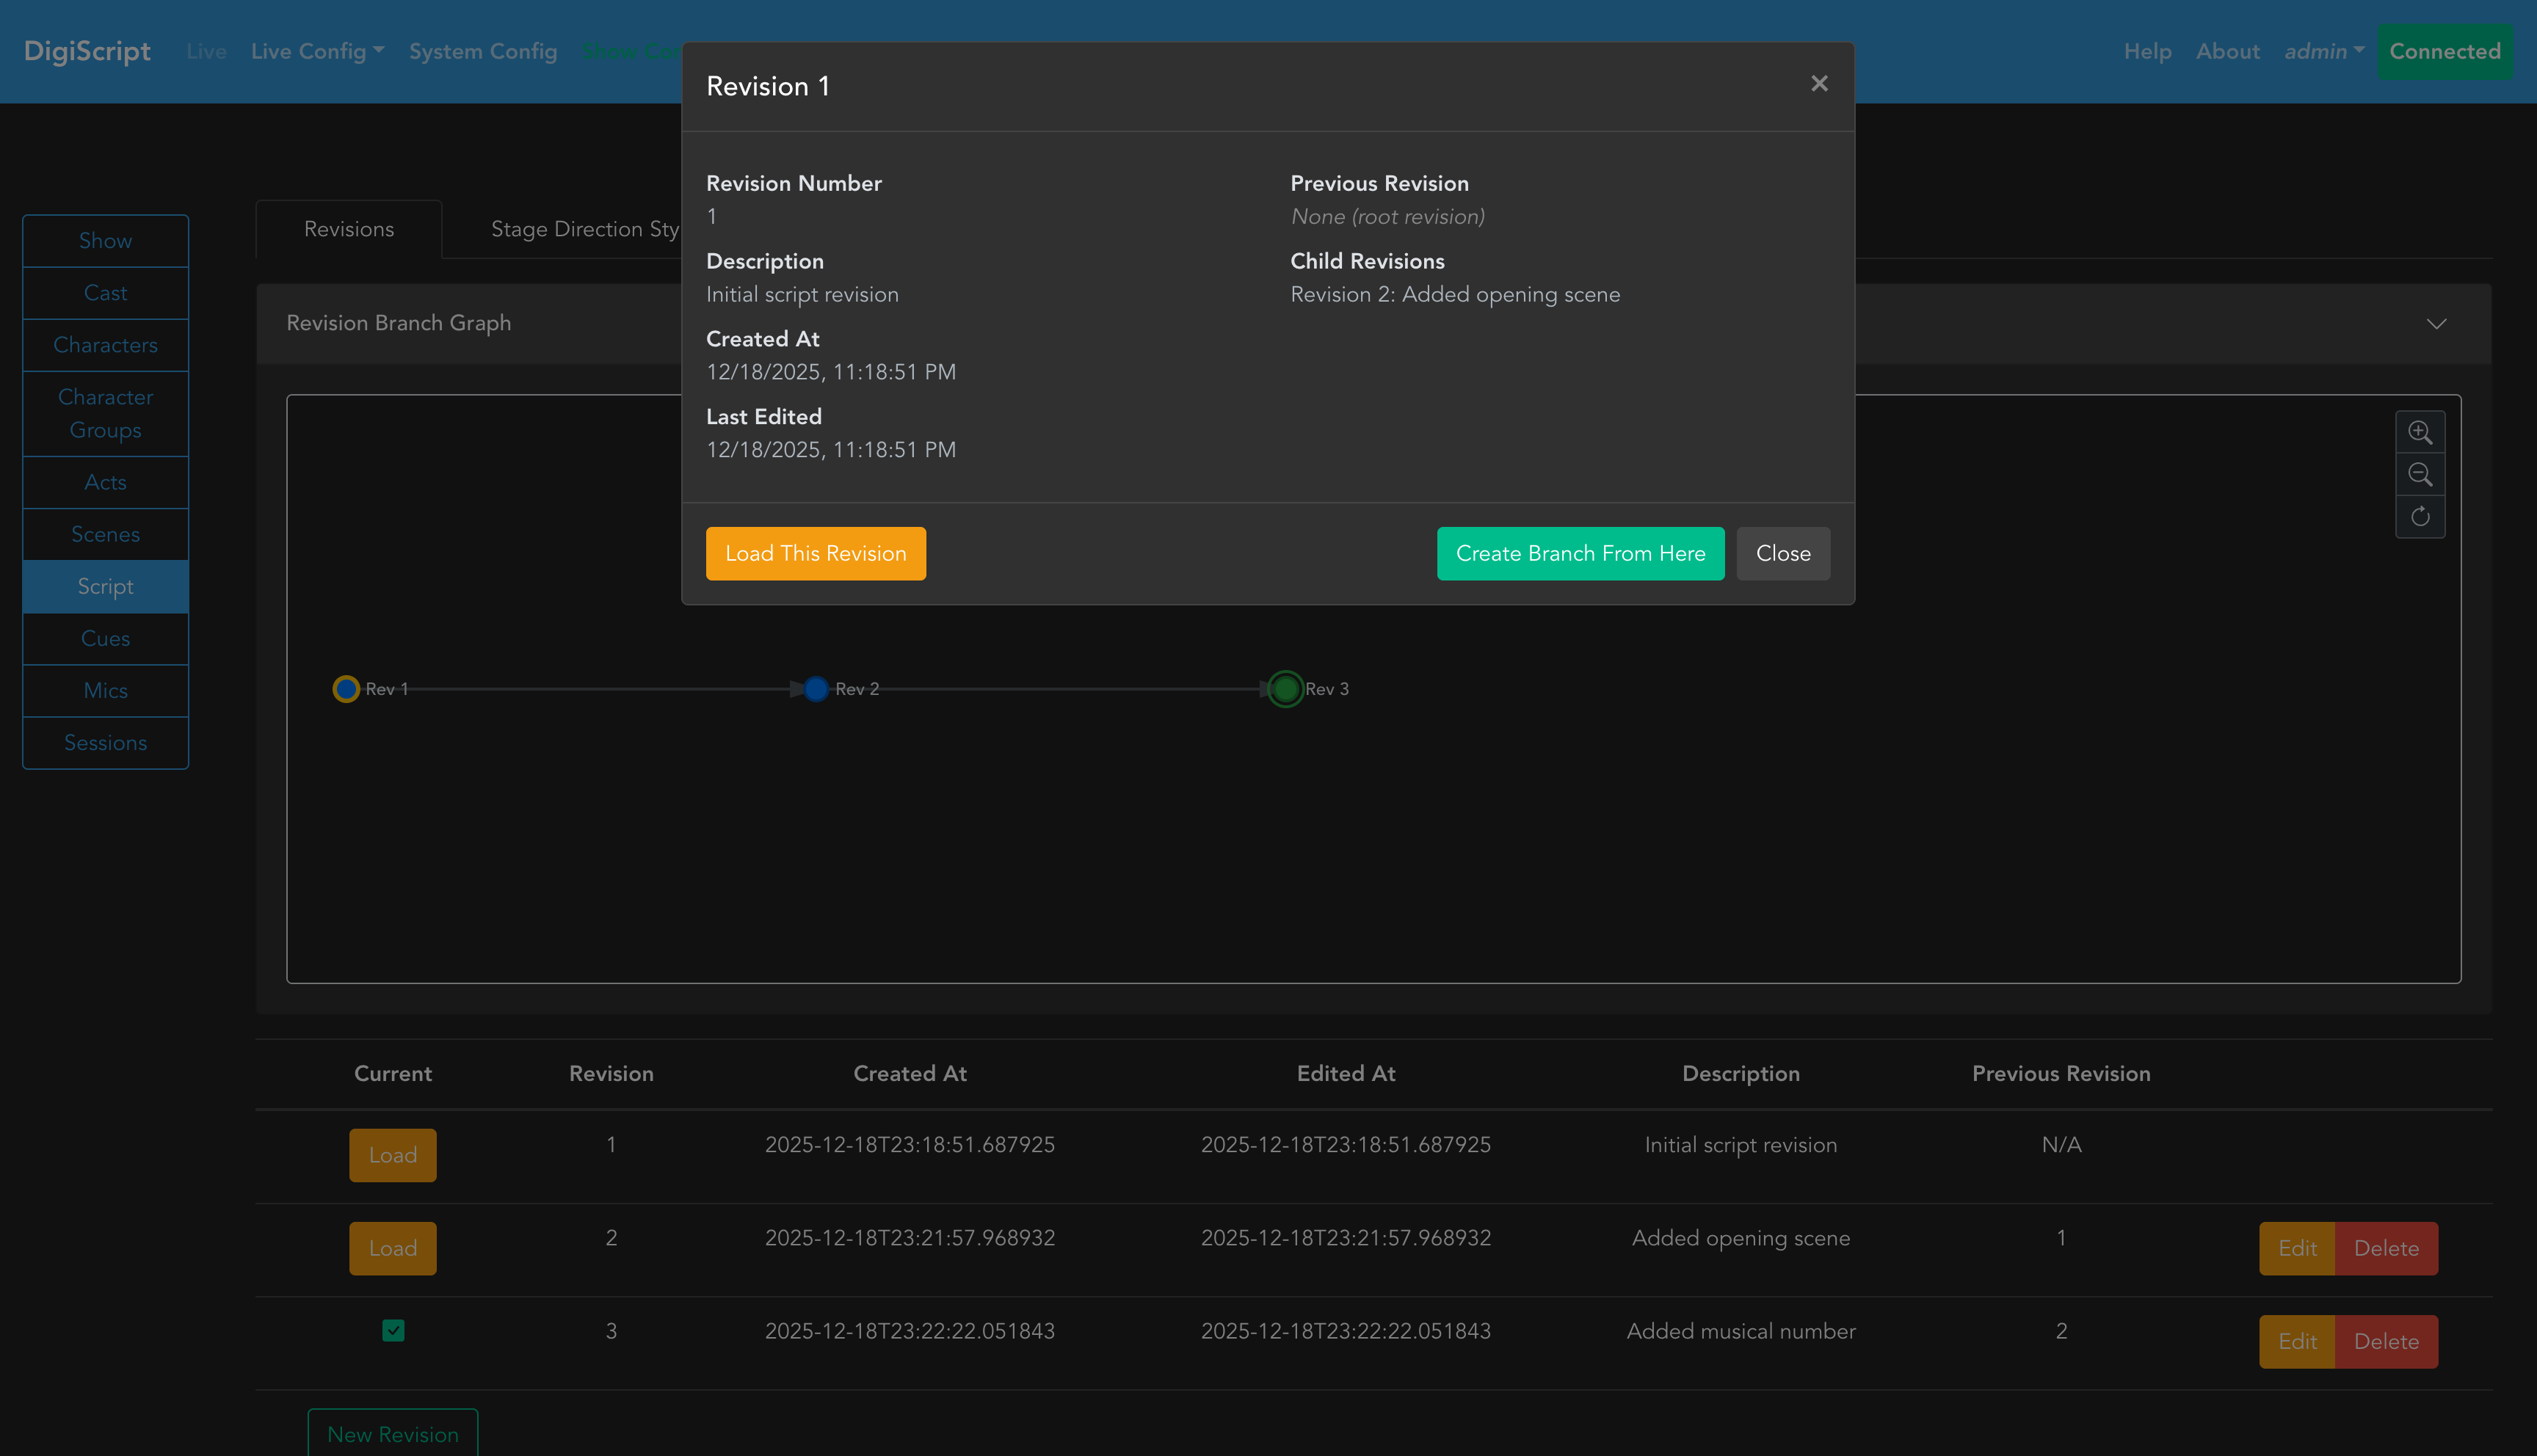
Interacting with the Graph
You can interact with the revision graph in several ways:
Clicking on Nodes: Click any node in the graph to open a detailed modal showing:
- Revision metadata (number, description, dates)
- Previous (parent) revision
- Child revisions (branches created from this revision)
- Actions: Load This Revision, Create Branch From Here
Pan and Zoom: Use your mouse or trackpad to pan around the graph and see all revisions. The zoom controls in the top-right corner allow you to:
- Zoom in (+)
- Zoom out (-)
- Reset zoom (↻)
Collapse the Graph: Click the chevron icon in the graph header to collapse/expand the graph card, saving screen space when not needed.
Creating Branches
You can create alternative versions of your script by branching from any revision:
- Click on the revision you want to branch from
- Click Create Branch From Here in the detail modal
- Enter a description for the new branch
- Click OK
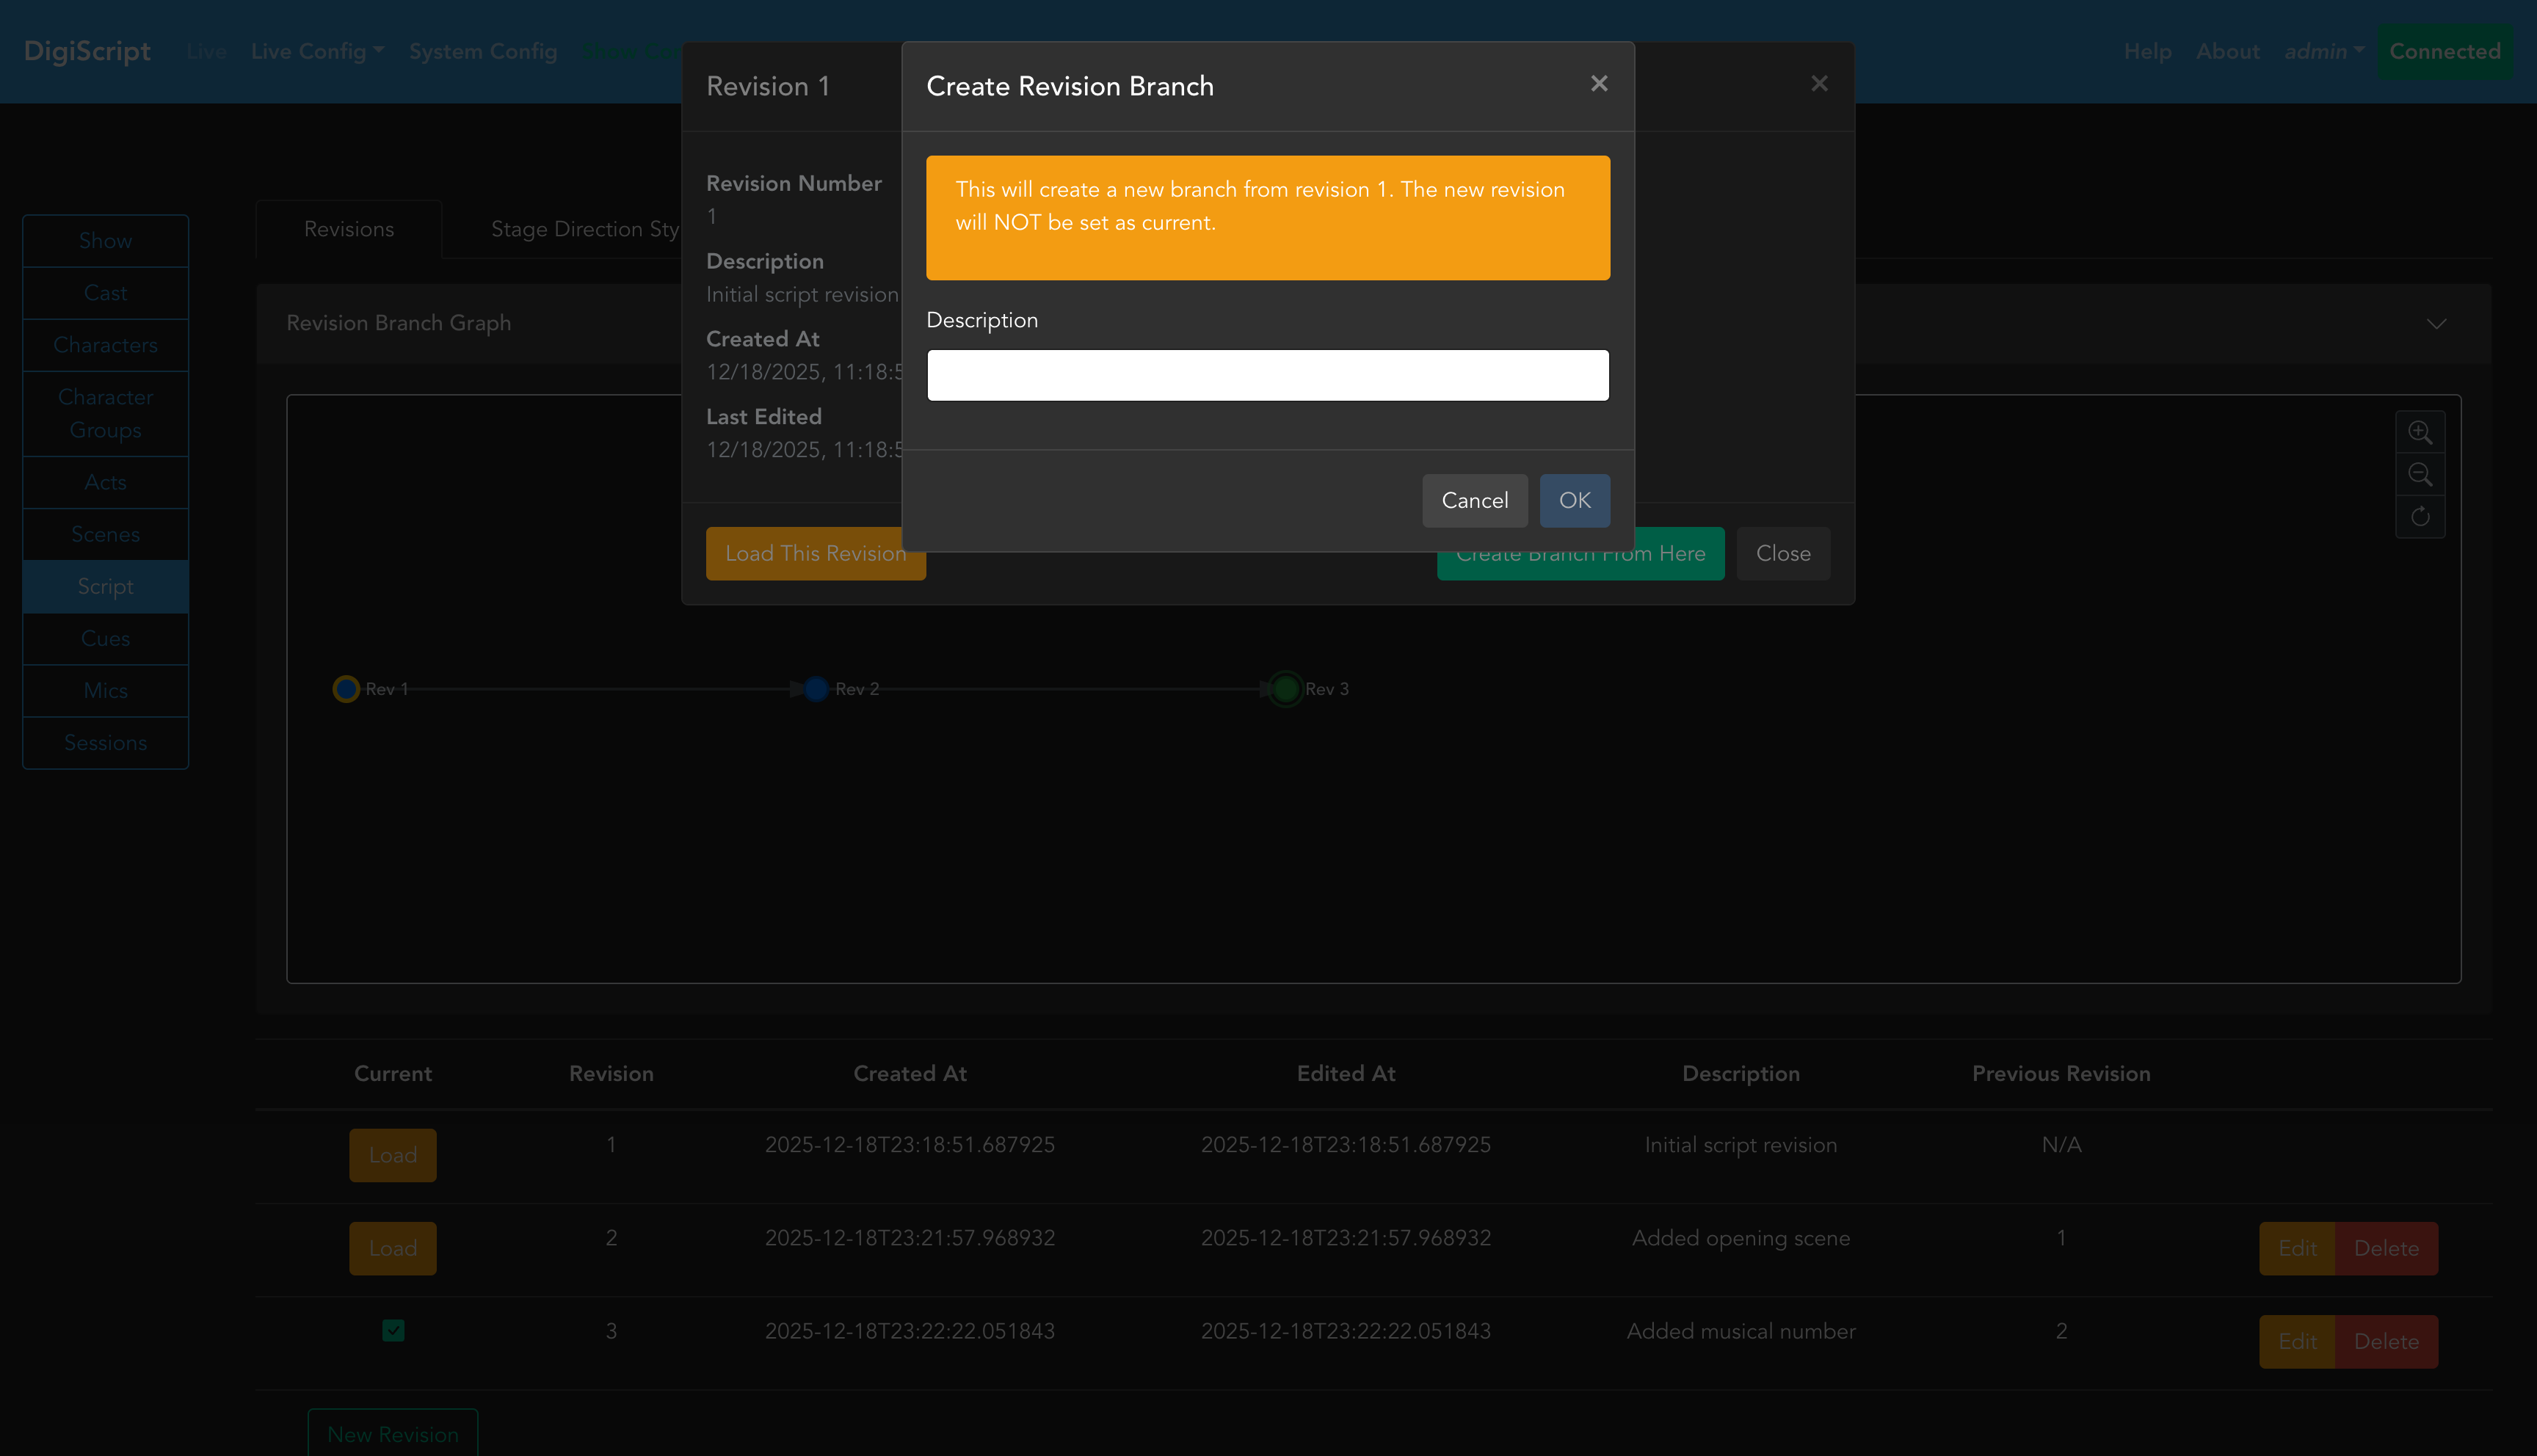
Important: When creating a branch from the current revision, the new revision becomes the active revision. When branching from a non-current revision, the new branch is created as an alternative version without changing which revision is currently loaded.
Creating a New Revision
Click New Revision to create a new revision. You’ll need to provide a description for the revision to help identify it later.
When you create a new revision, its base state is copied from the currently loaded revision. Any changes you make to the script after that point will only affect the active revision - other revisions remain unchanged, preserving the complete history of your script.
Stage Direction Styles
The Stage Direction Styles tab lets you define the visual appearance of stage direction lines throughout your script. Each style controls the text formatting applied when that style is assigned to a stage direction line.
Creating a New Style
Click New Style to open the style editor. You can configure:
- Description — a name for the style (e.g. “Narrator”, “Whisper”)
- Default Styles — toggle Bold, Italic, and Underline
- Default Text Format — Default, Uppercase, or Lowercase
- Text Colour — a colour picker for the text colour
- Background Colour — optionally enable and choose a background highlight colour
A live preview of the style is shown at the top of the editor so you can see how it will appear in the script before saving.
Importing Styles from Another Show
Click Import Style to open the import modal. This shows all stage direction styles from every other show in your DigiScript instance, grouped by show name. Each style is displayed with its live preview so you can see exactly what it will look like.
Click Import next to any style to copy it into the current show. The import creates an independent copy — changes to the imported style will not affect the original show, and vice versa. The modal stays open so you can import multiple styles in a single session.
If no other shows have stage direction styles defined, a message is shown indicating there are no styles available to import.
Script Content
The Script tab is where you edit the actual script content. When you first navigate to this tab, you’ll see an empty script interface:
![]()
Editing the Script
To begin editing, click the Begin Editing button. This requests exclusive edit access from the backend, ensuring only one person can edit the script at a time to prevent conflicting changes.
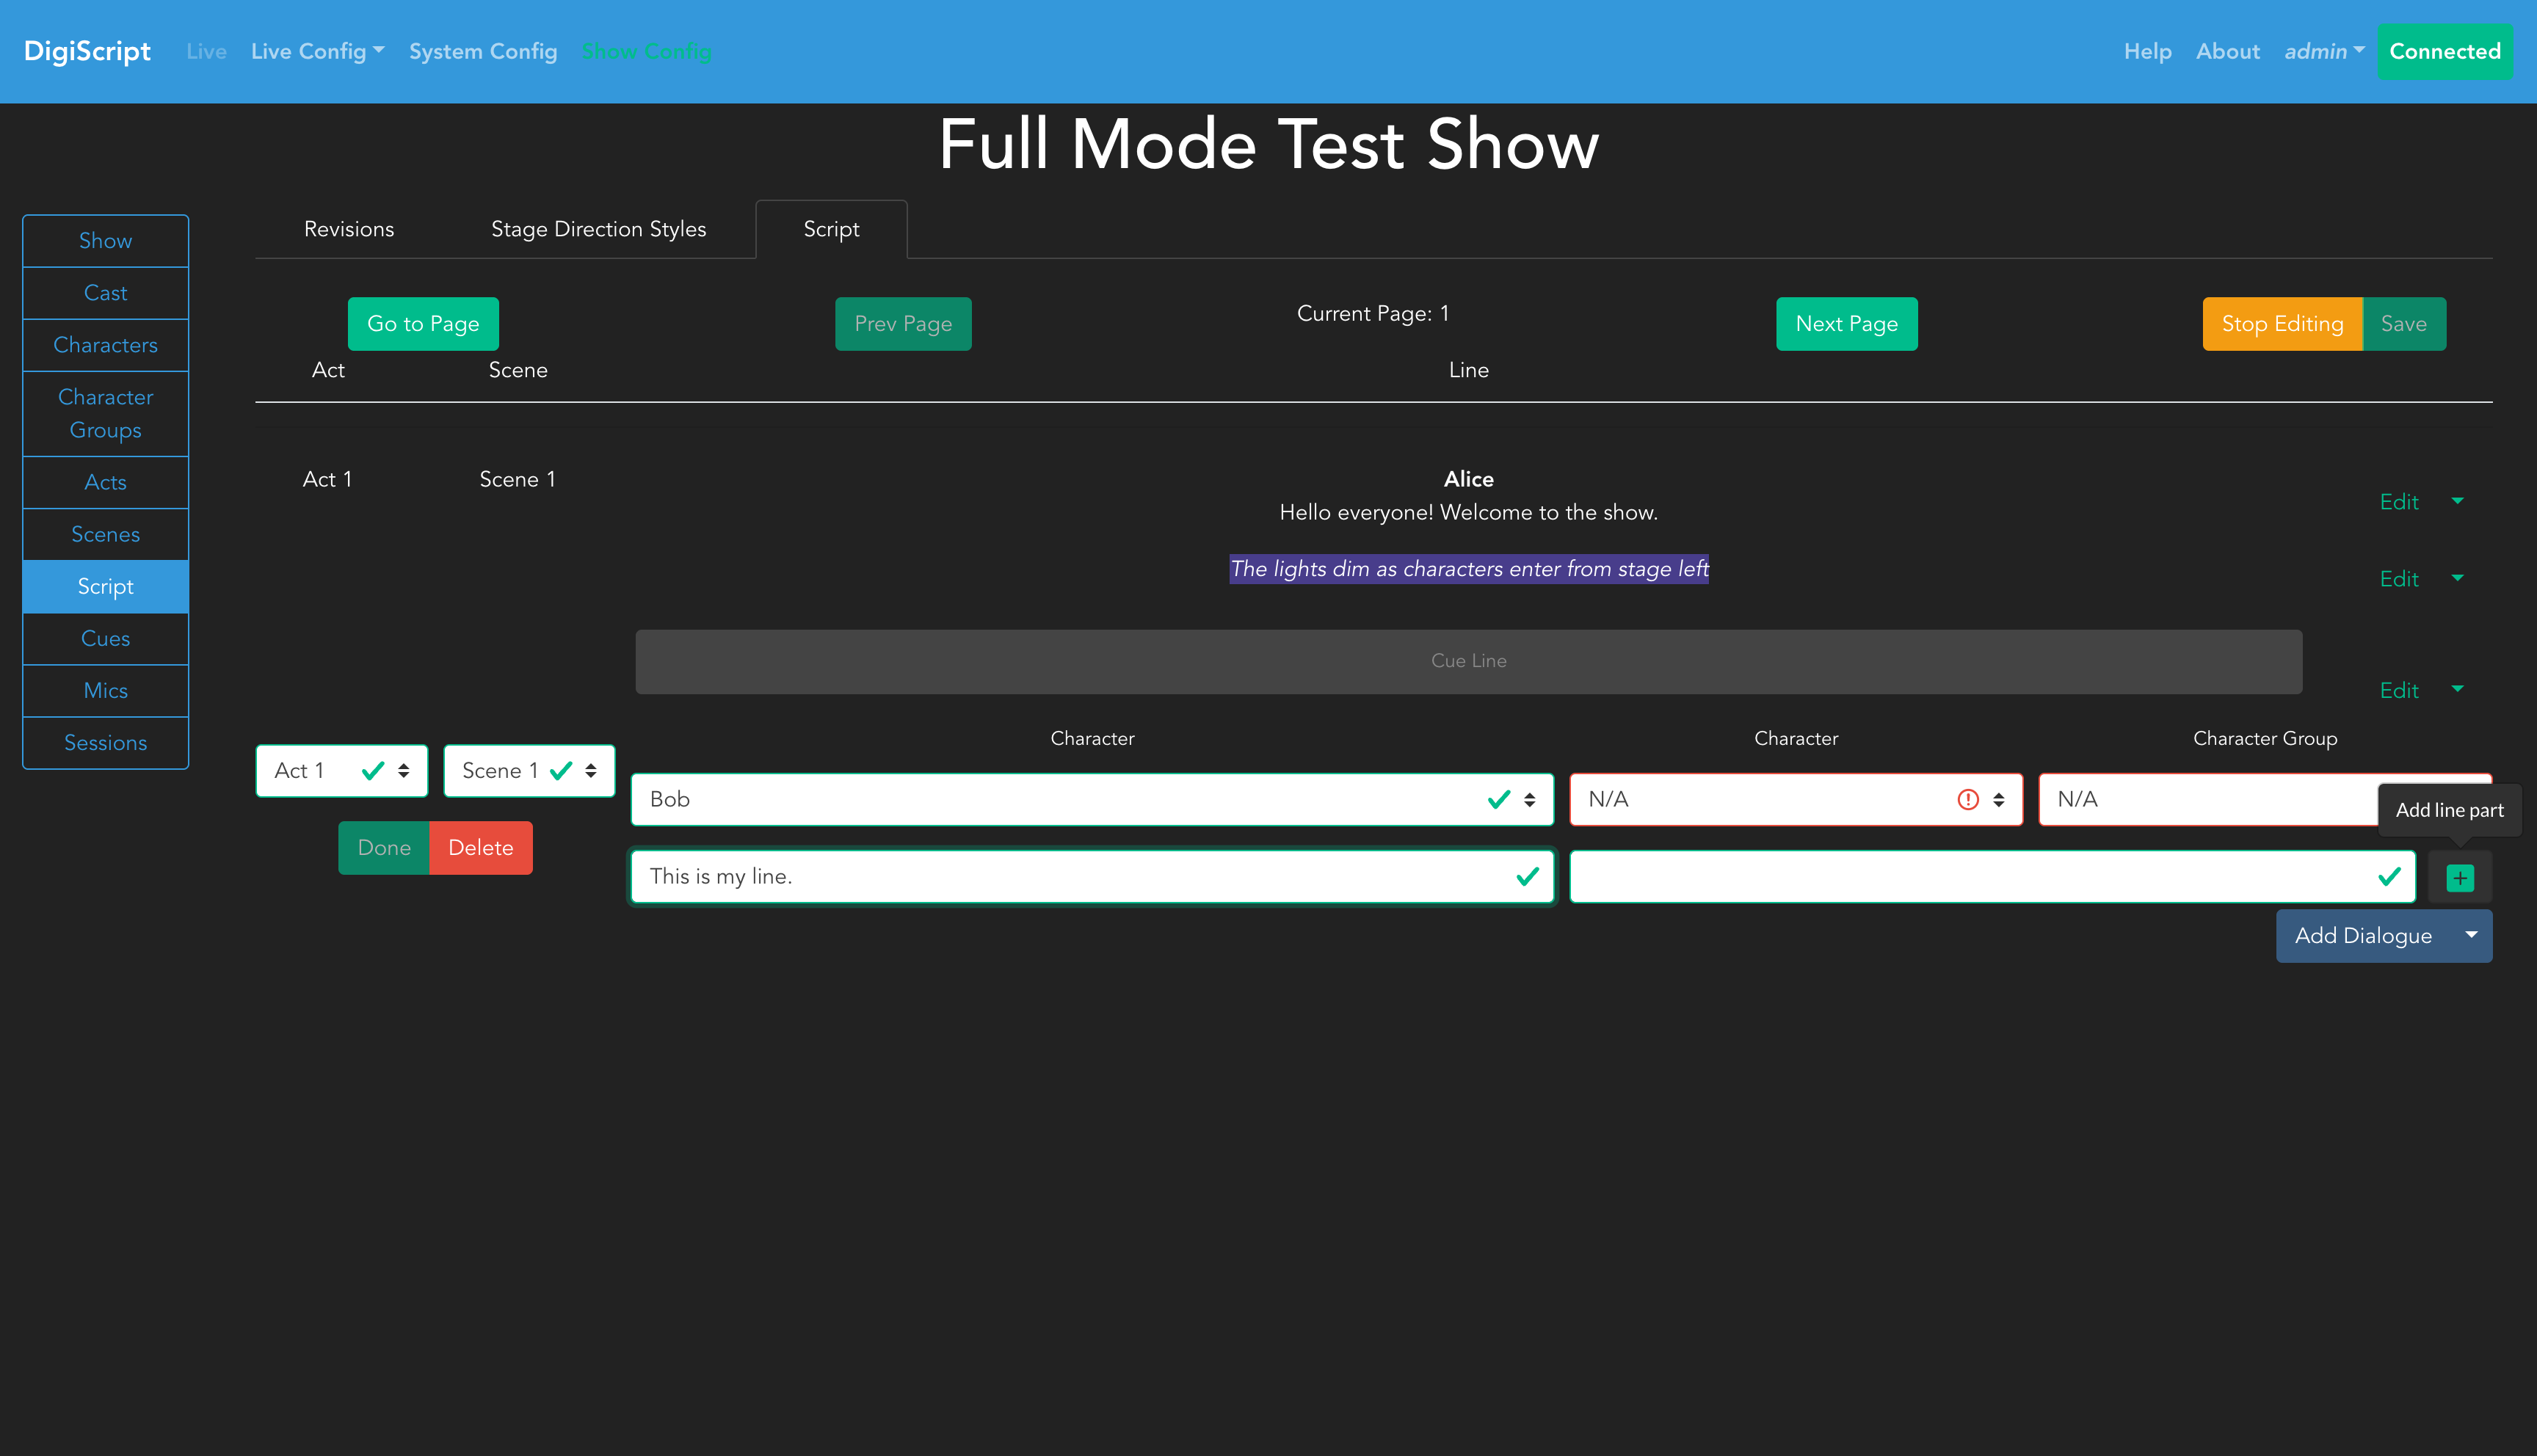
Once you have edit access, you’ll see options to Save the script, along with a dropdown button for Add Dialogue that provides access to all line types.
Line Types
DigiScript supports four types of script lines, each serving a specific purpose:

Dialogue Lines
The default line type for character speech. Dialogue lines:
- Require a character or character group assignment
- Can contain up to 4 parts (multi-part lines) in FULL mode
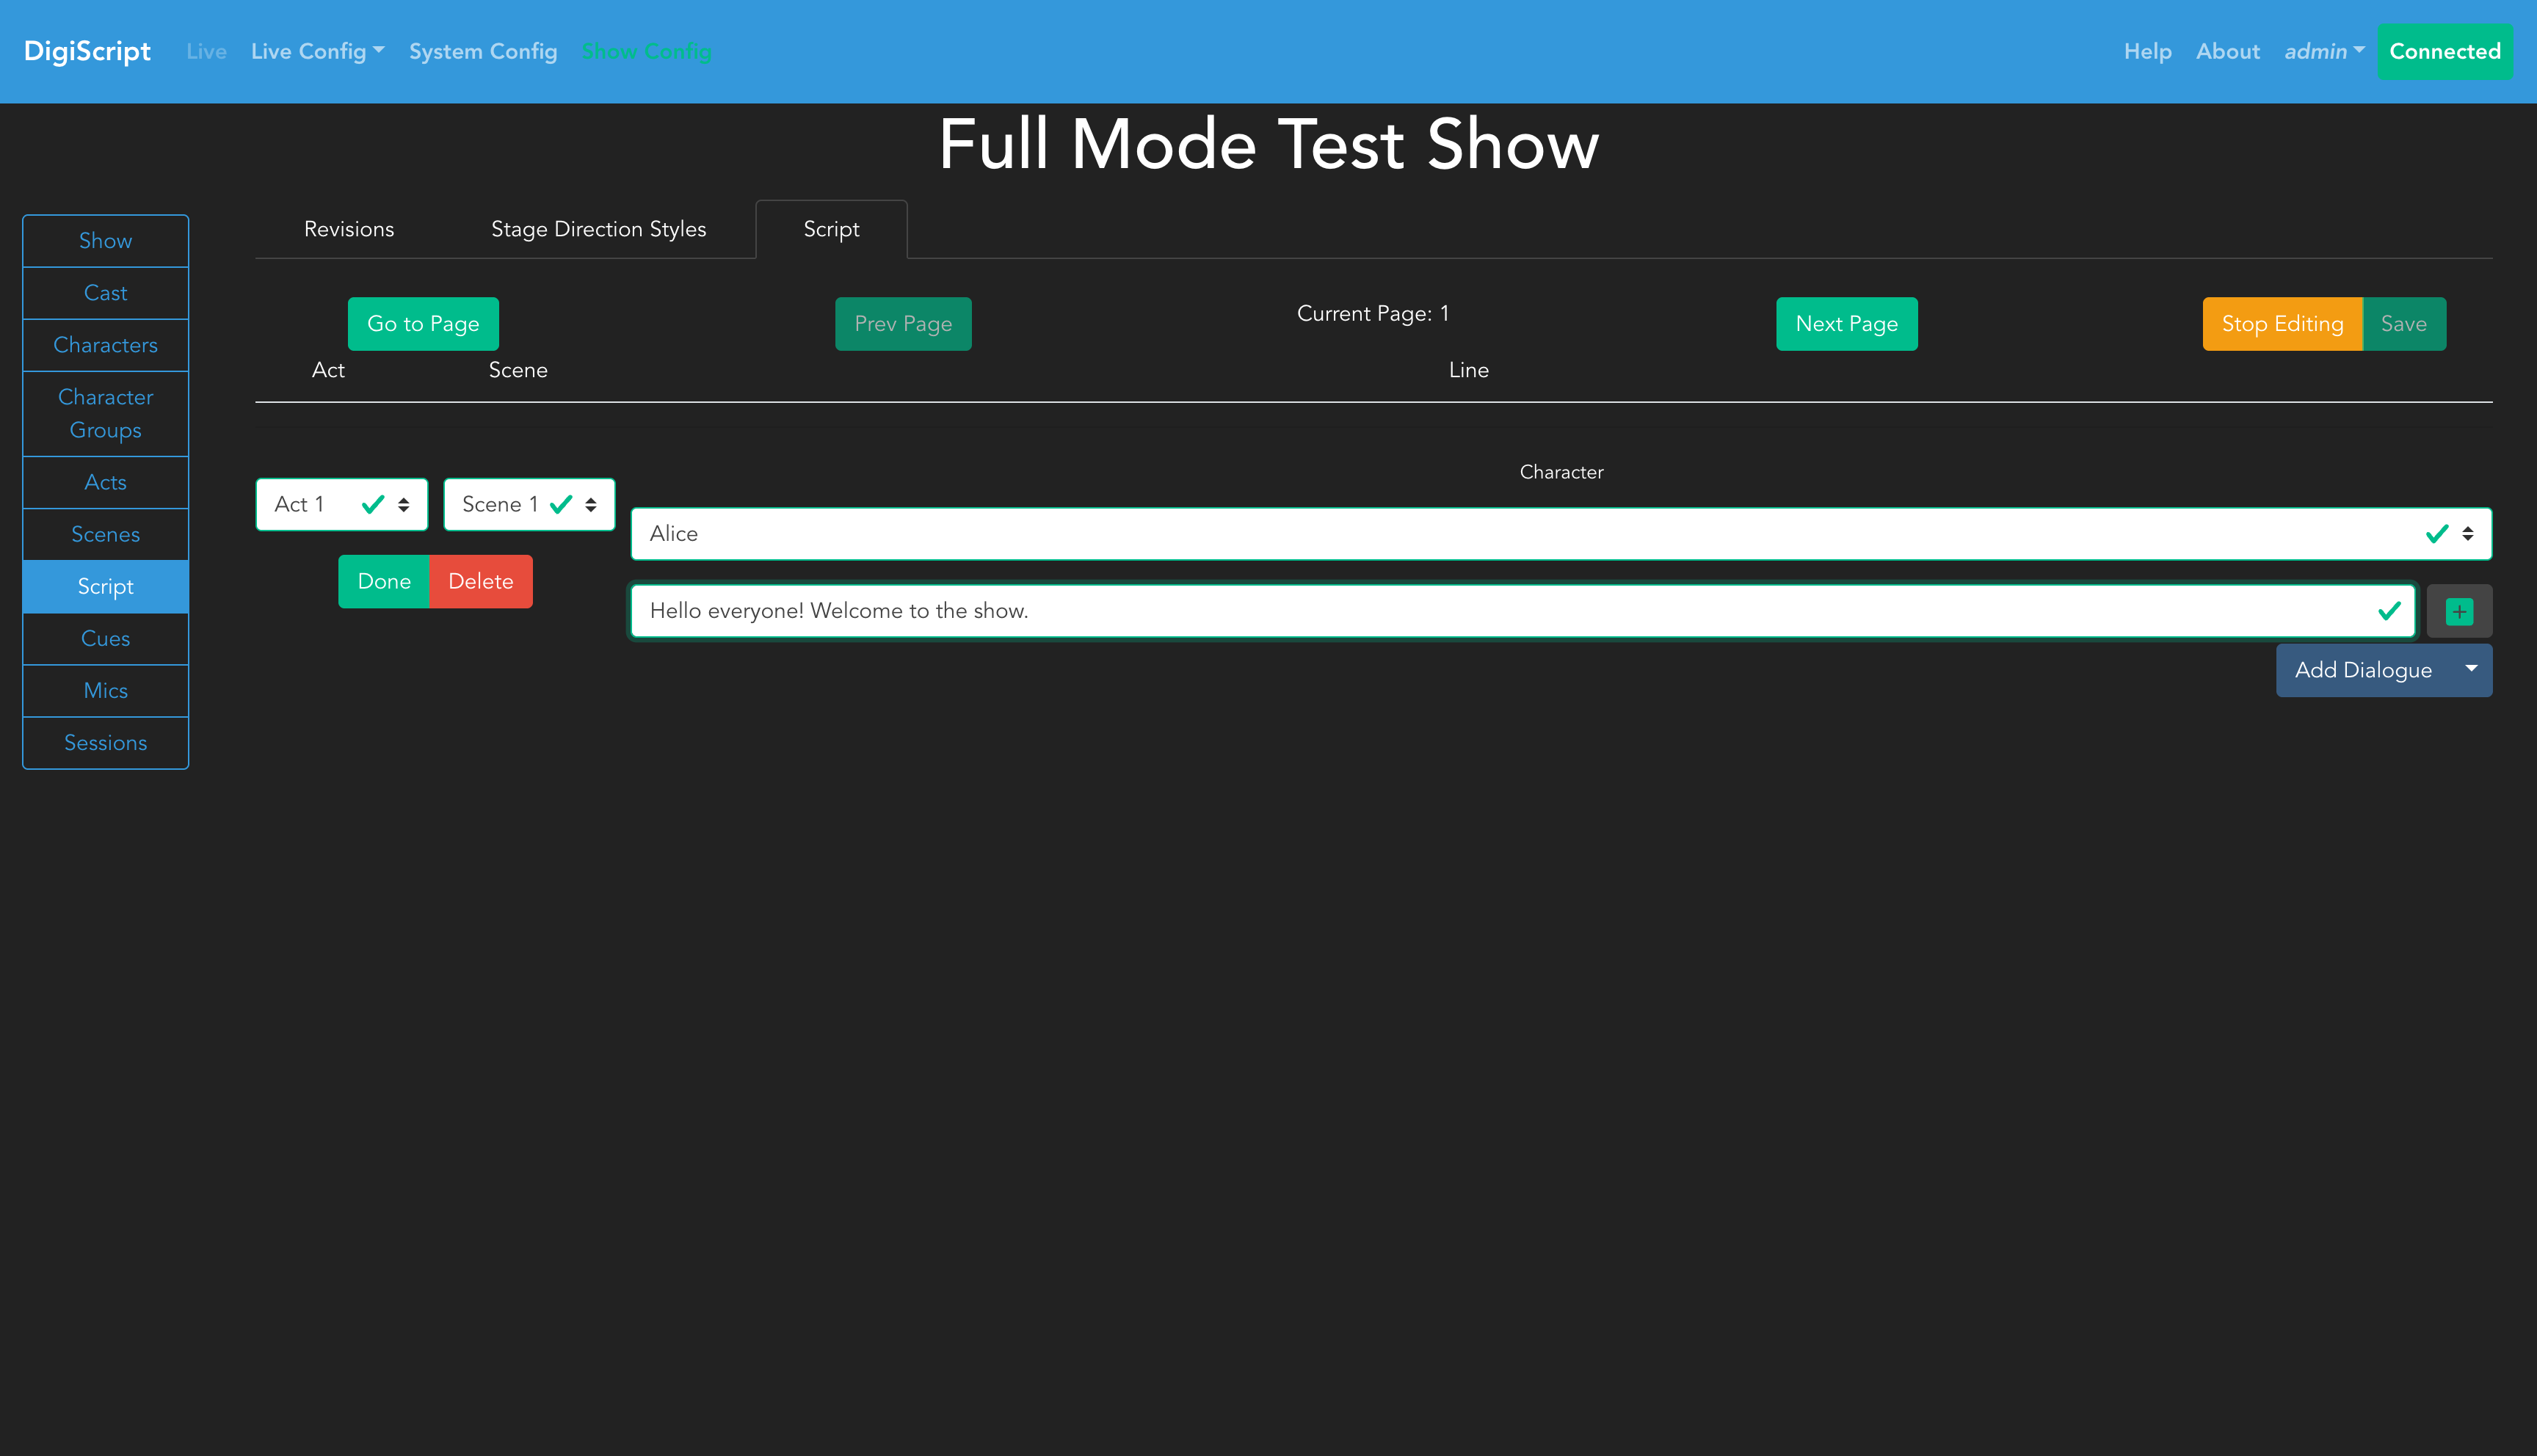
To create a dialogue line:
- Click Add Dialogue (or select it from the dropdown)
- Select the Act and Scene where the line occurs
- Choose the Character or Character Group speaking the line
- Enter the line content
- Click Done to finish editing the line
Stage Direction Lines
Non-dialogue text for describing actions, movements, or technical directions. Stage direction lines:
- Contain a single text field
- Display in italic formatting with customizable styling
- Can be styled with Stage Direction Styles (system-level or user preferences)
- Optionally tagged to a character or character group (see below)
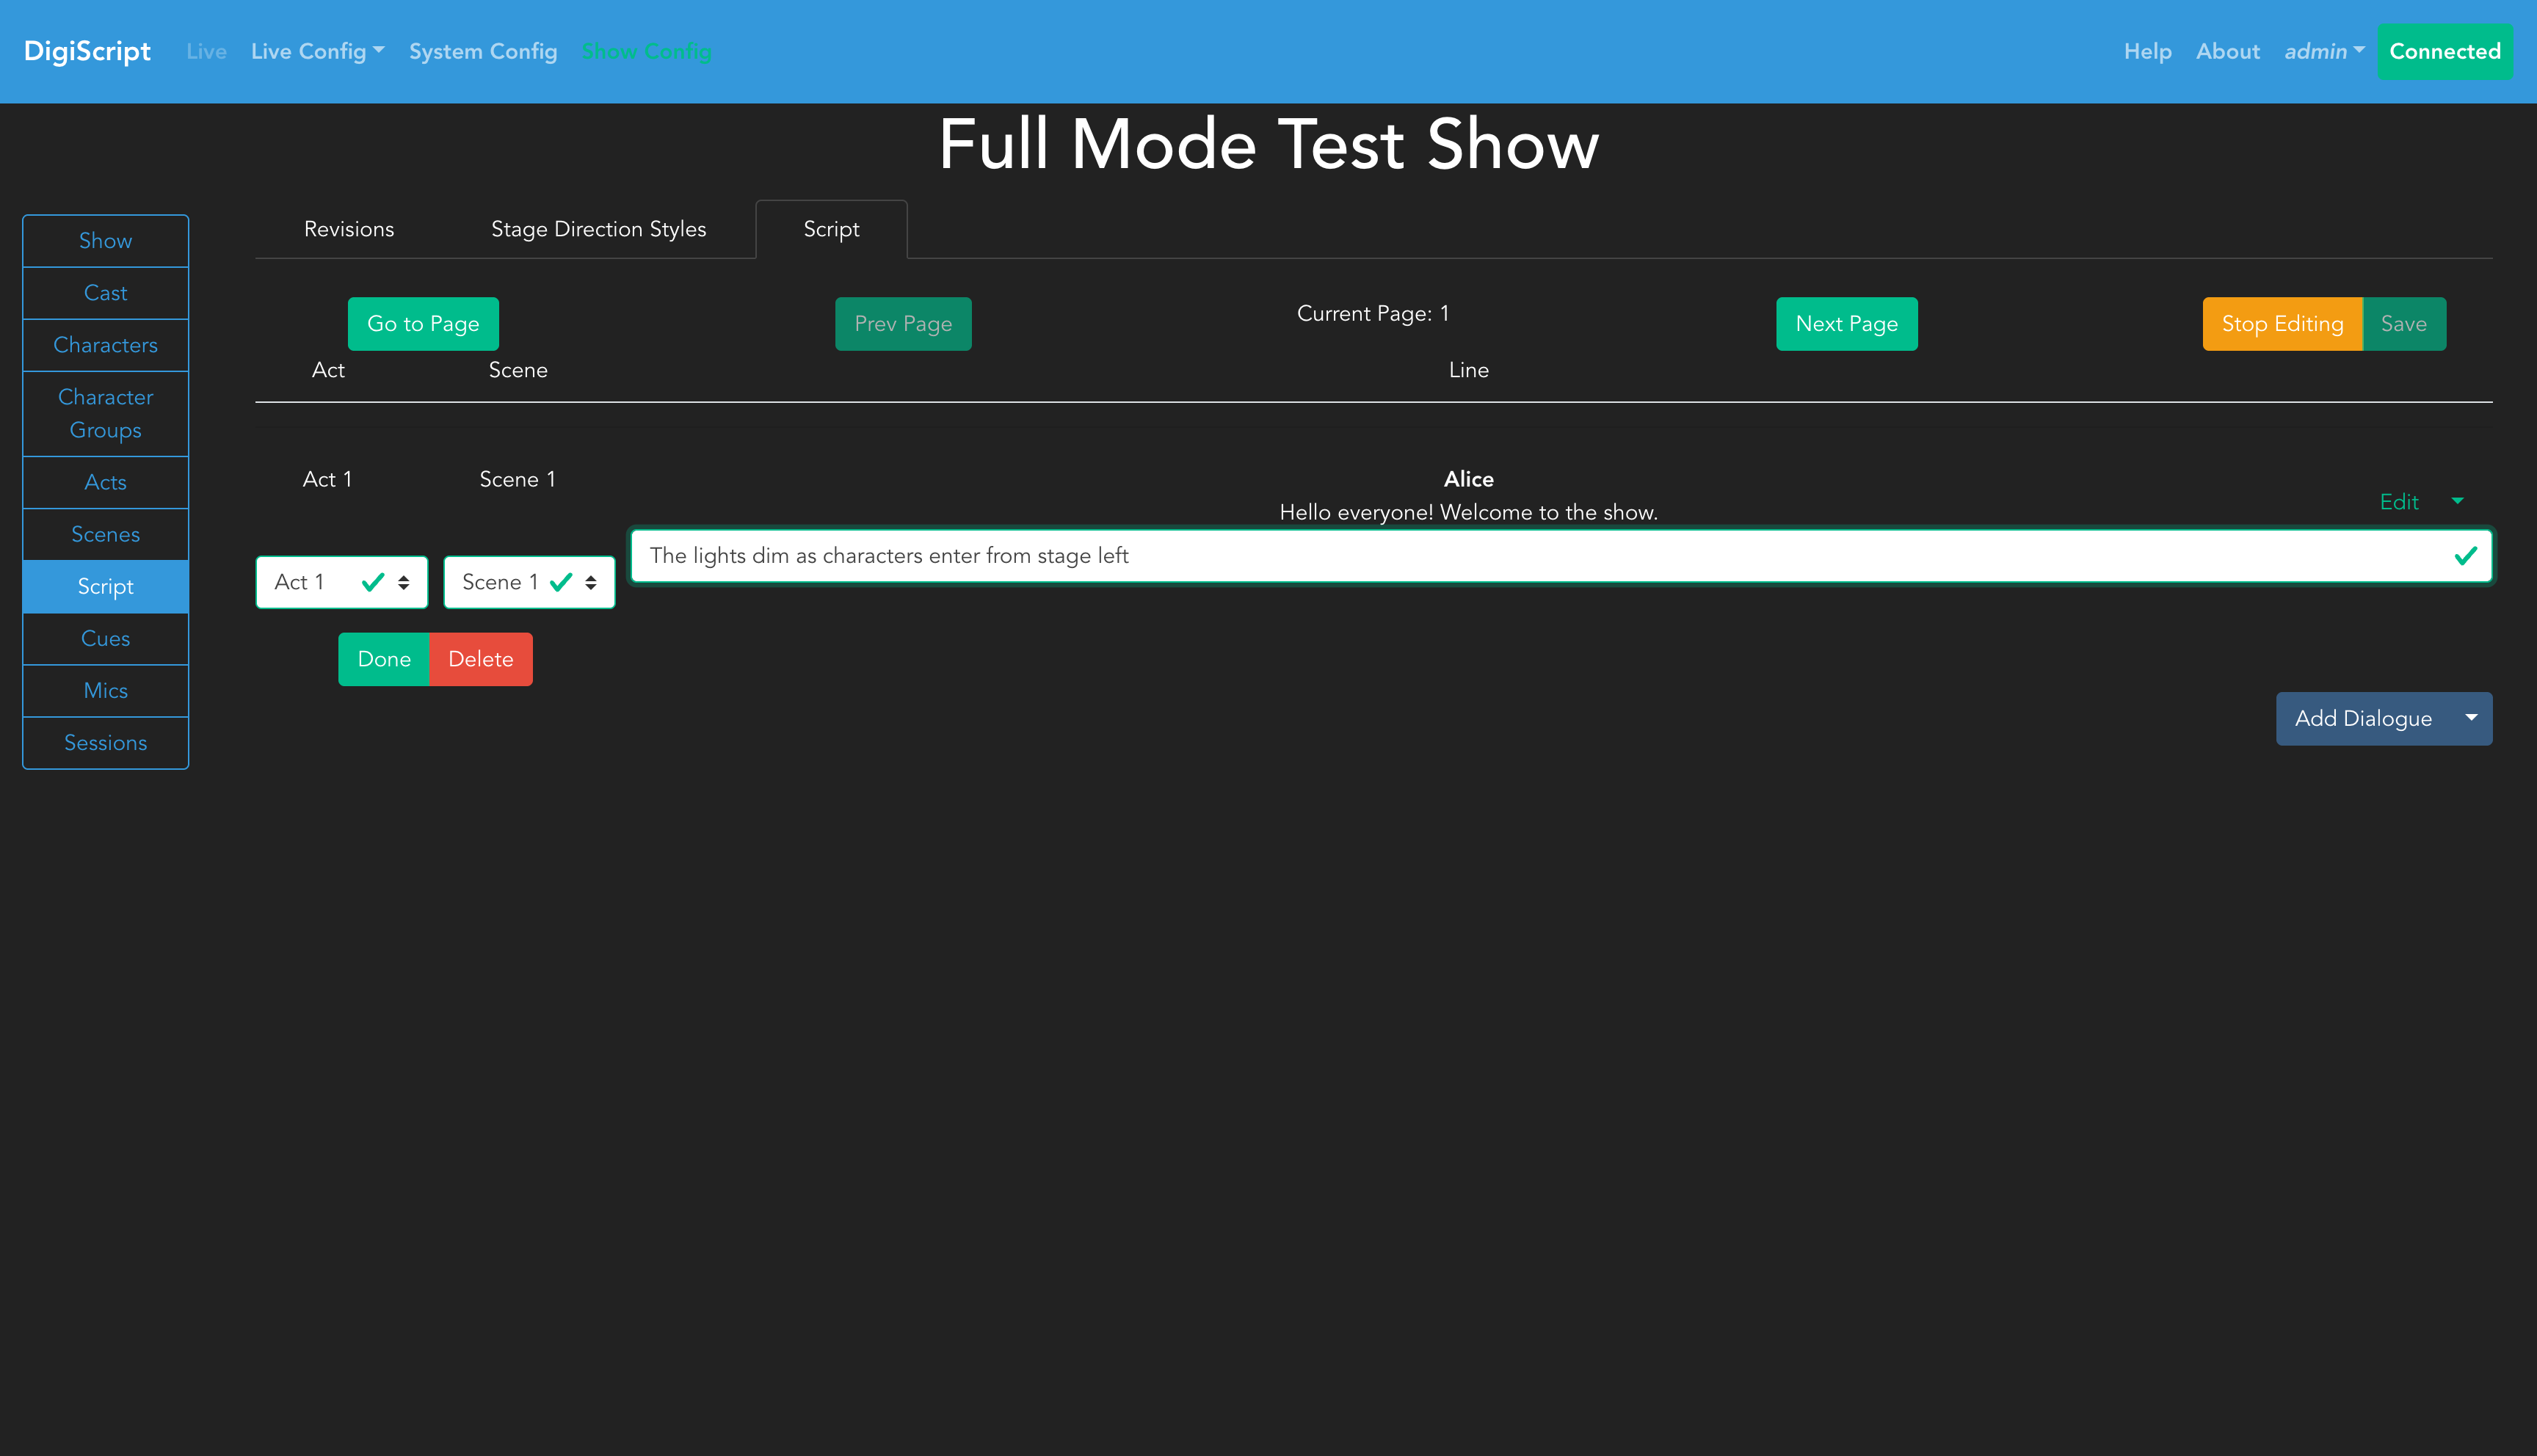
To create a stage direction, select Add Stage Direction from the dropdown menu.
Tagged Stage Directions
A stage direction can optionally be tagged to a Character or Character Group. This is useful when a stage direction is specific to a character and should appear visually under that character’s heading in the script — for example, a move or action described directly after a character speaks.
To tag a stage direction:
- In the line editor, use the Character or Character Group dropdown to select who the stage direction belongs to. Leave both as “N/A” for a generic (untagged) stage direction.
- Only one of character or character group can be set — not both.
When a tagged stage direction is displayed in the script, a character heading appears above it (just as one does above dialogue) whenever the character has changed since the previous line. In the compact live view, the character name appears in the left-hand character column.
Cue Lines
Special lines designed for placing technical cues without associated dialogue. Cue lines:
- Have no editable content (displayed as “Cue Lines have no editable content”)
- Provide a clean attachment point for cues (LX, SND, etc.)
- Are useful for cues that occur between dialogue or during pauses
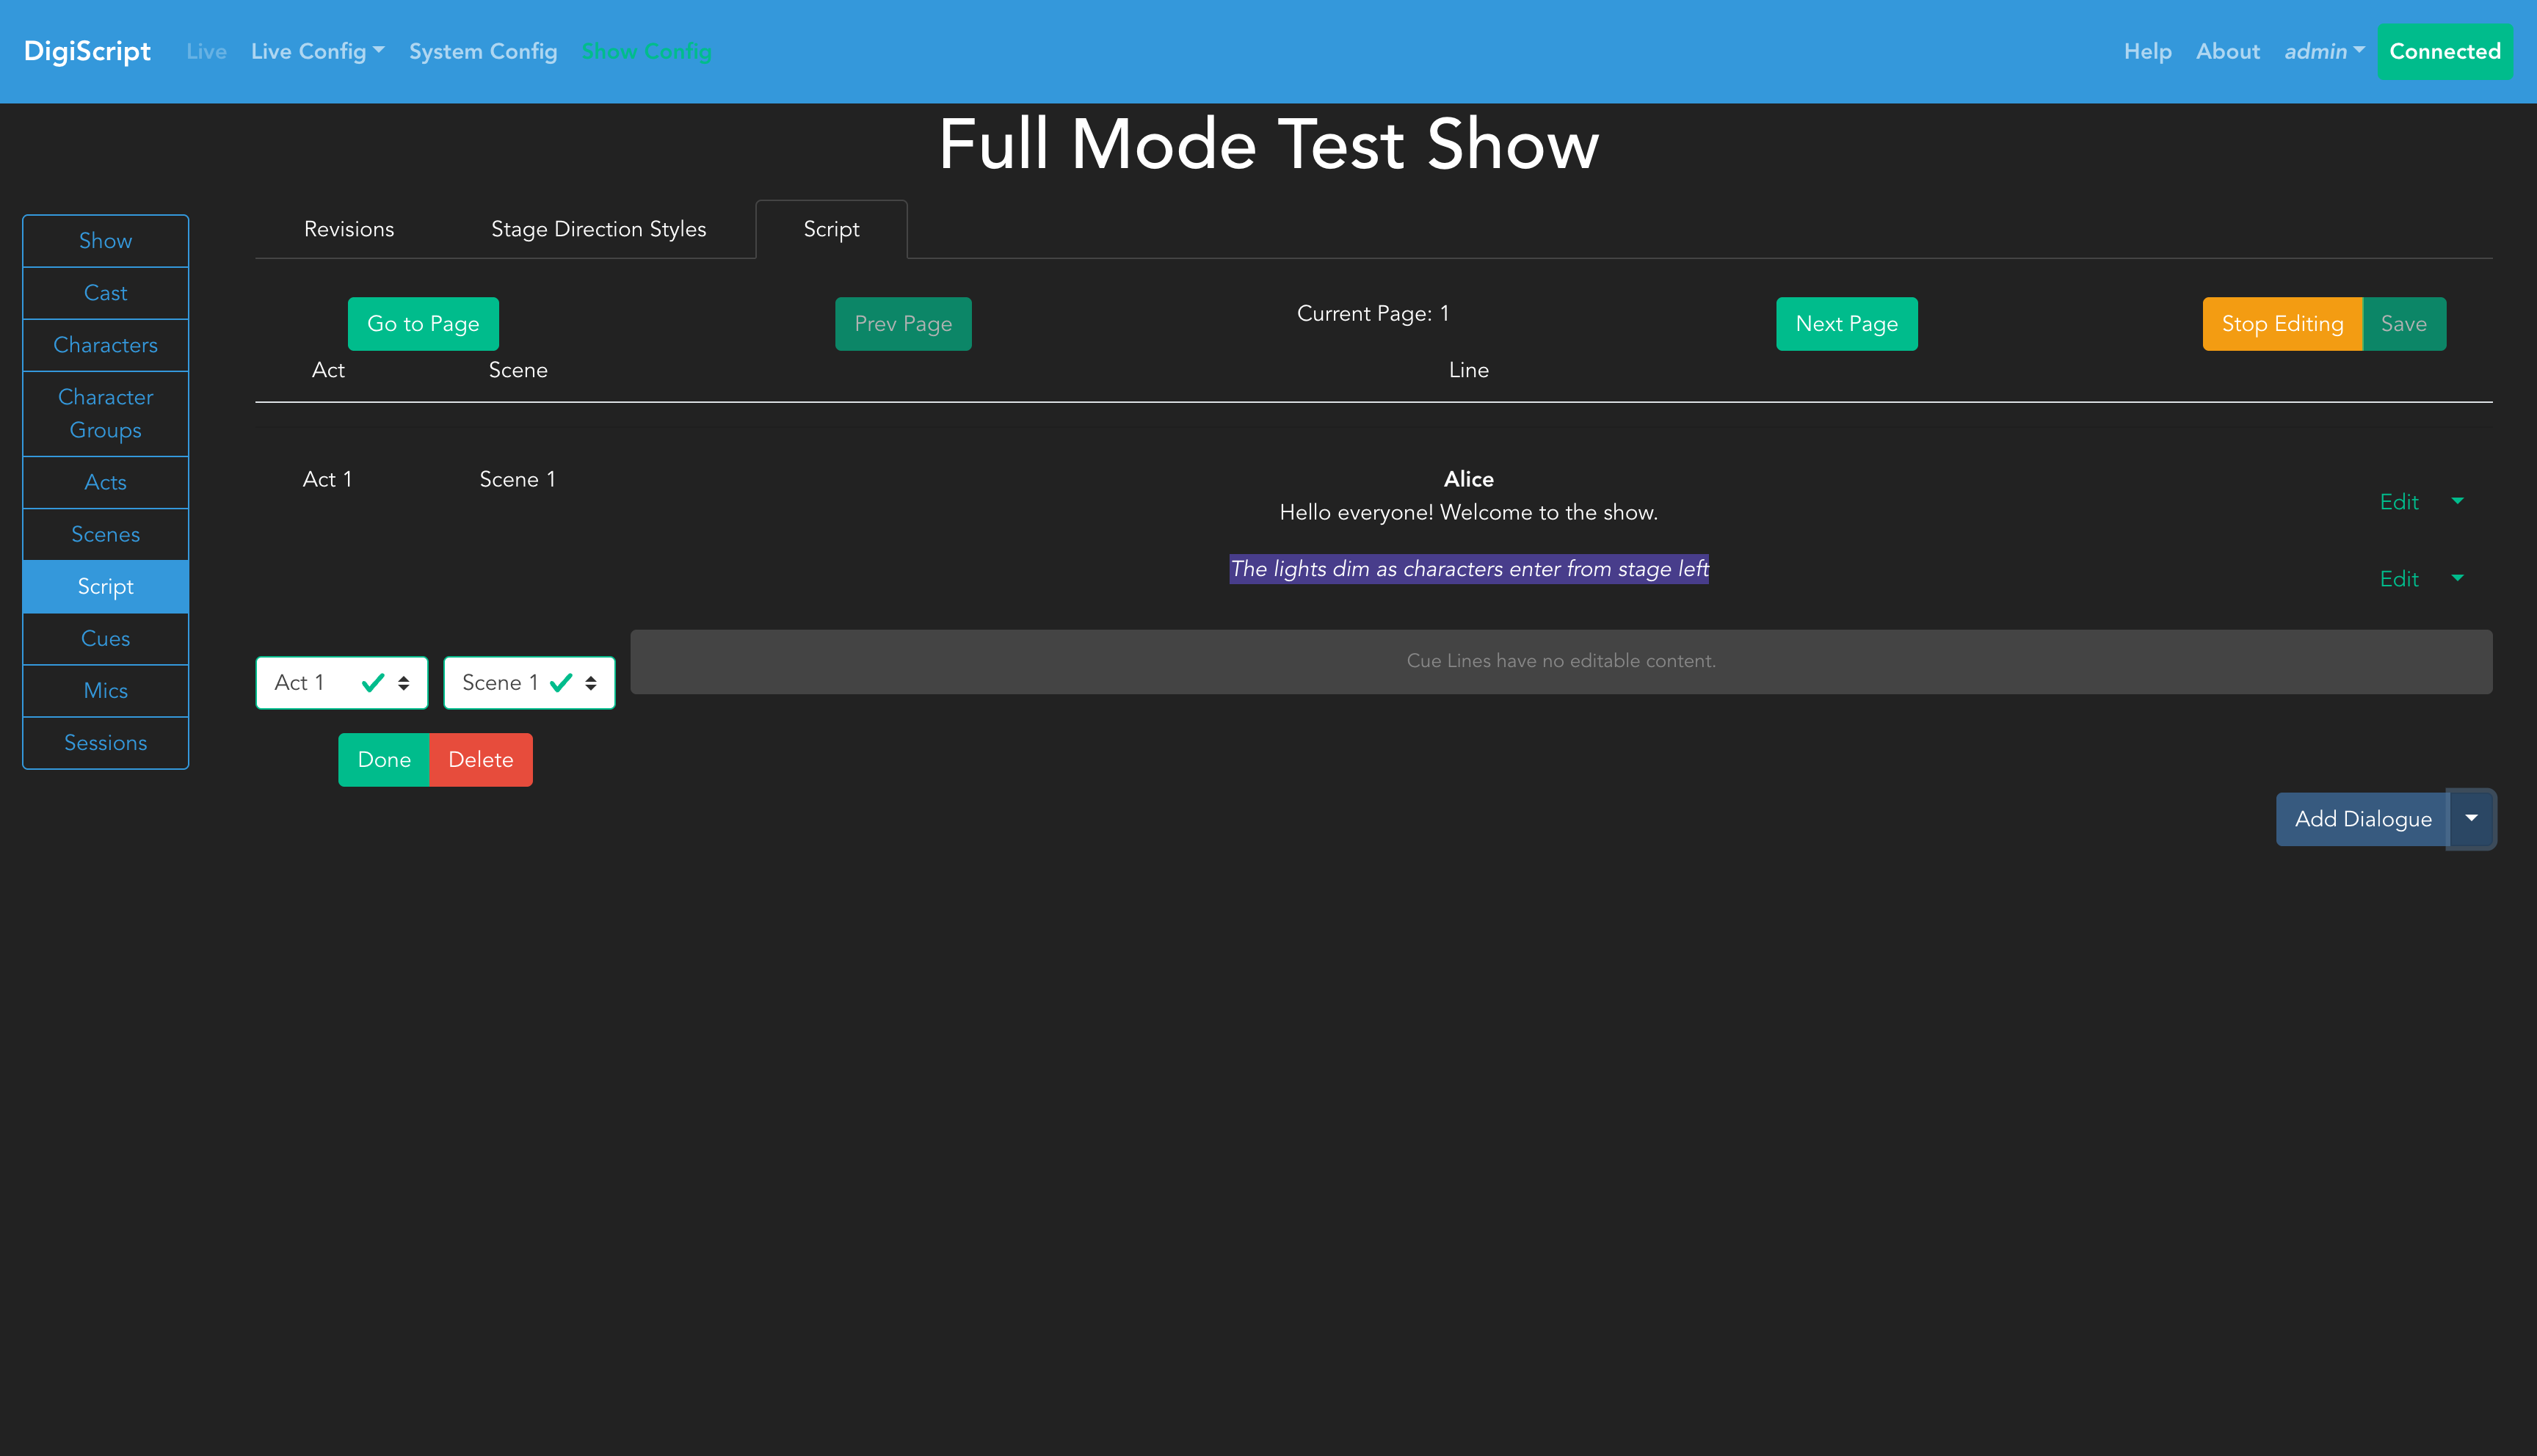
To create a cue line, select Add Cue Line from the dropdown menu.
Spacing Lines
Blank lines that add vertical spacing in your script. Spacing lines:
- Have no editable content (displayed as “Spacing Lines have no editable content”)
- Are automatically hidden in live shows
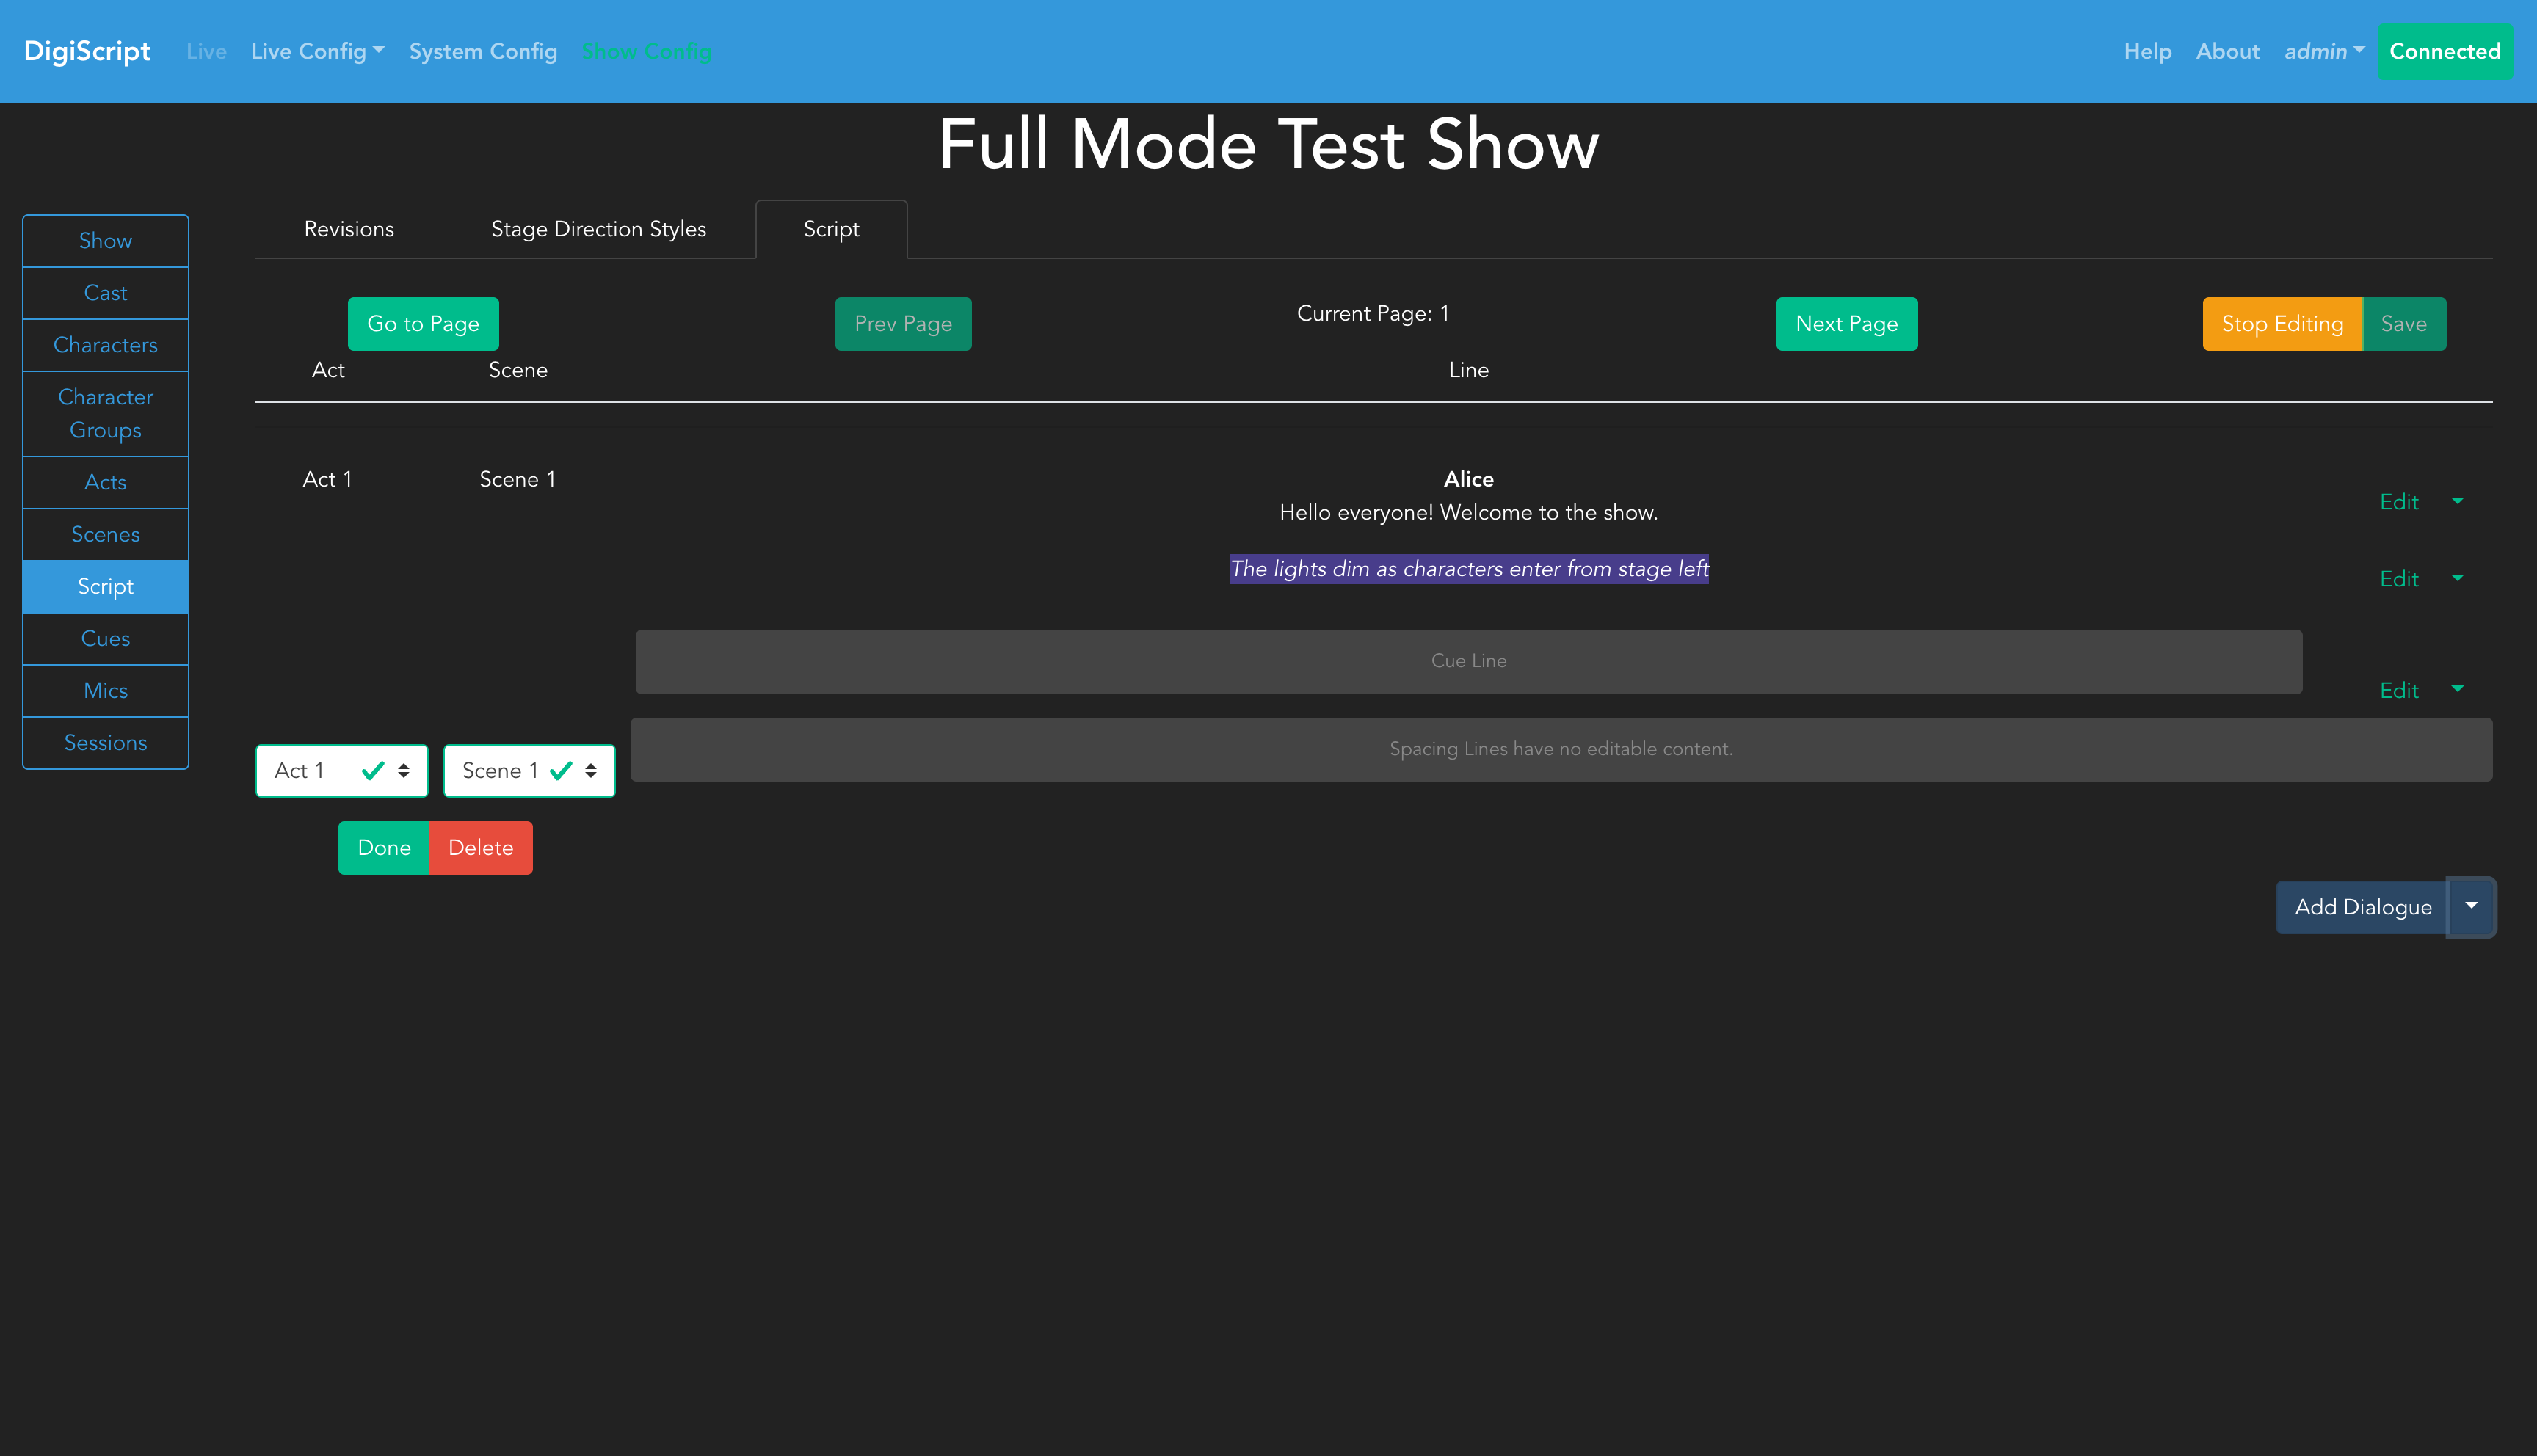
To create a spacing line, select Add Spacing from the dropdown menu.
Important: After clicking Done, DigiScript automatically creates a new empty line. If you don’t need this line, click Delete before adding your next line. The script cannot be saved while lines are in edit mode.
Multi-Part Lines
Dialogue lines can be made up of multiple parts (up to 4 per line) in FULL mode. This is useful for:
- Songs where multiple characters sing simultaneously
- Scenes where characters talk over each other
- Parallel dialogue
Click the green plus button in the line editor to add additional line parts. These will display as multiple columns in the script view.
Note: In COMPACT mode, multi-part lines are not available as the layout is optimized for single-column display. The add button for additional parts will not be visible when editing shows configured with COMPACT mode.
Page Navigation
Use the Prev Page and Next Page buttons at the top of the editor to navigate between pages of your script as it grows.
Saving Your Work
When you’re ready to save, ensure no lines are in edit mode, then click the green Save Script button. Your changes will be saved to the currently loaded revision.
View Mode
After saving, you can switch to view mode to see how the script will appear during a live show:
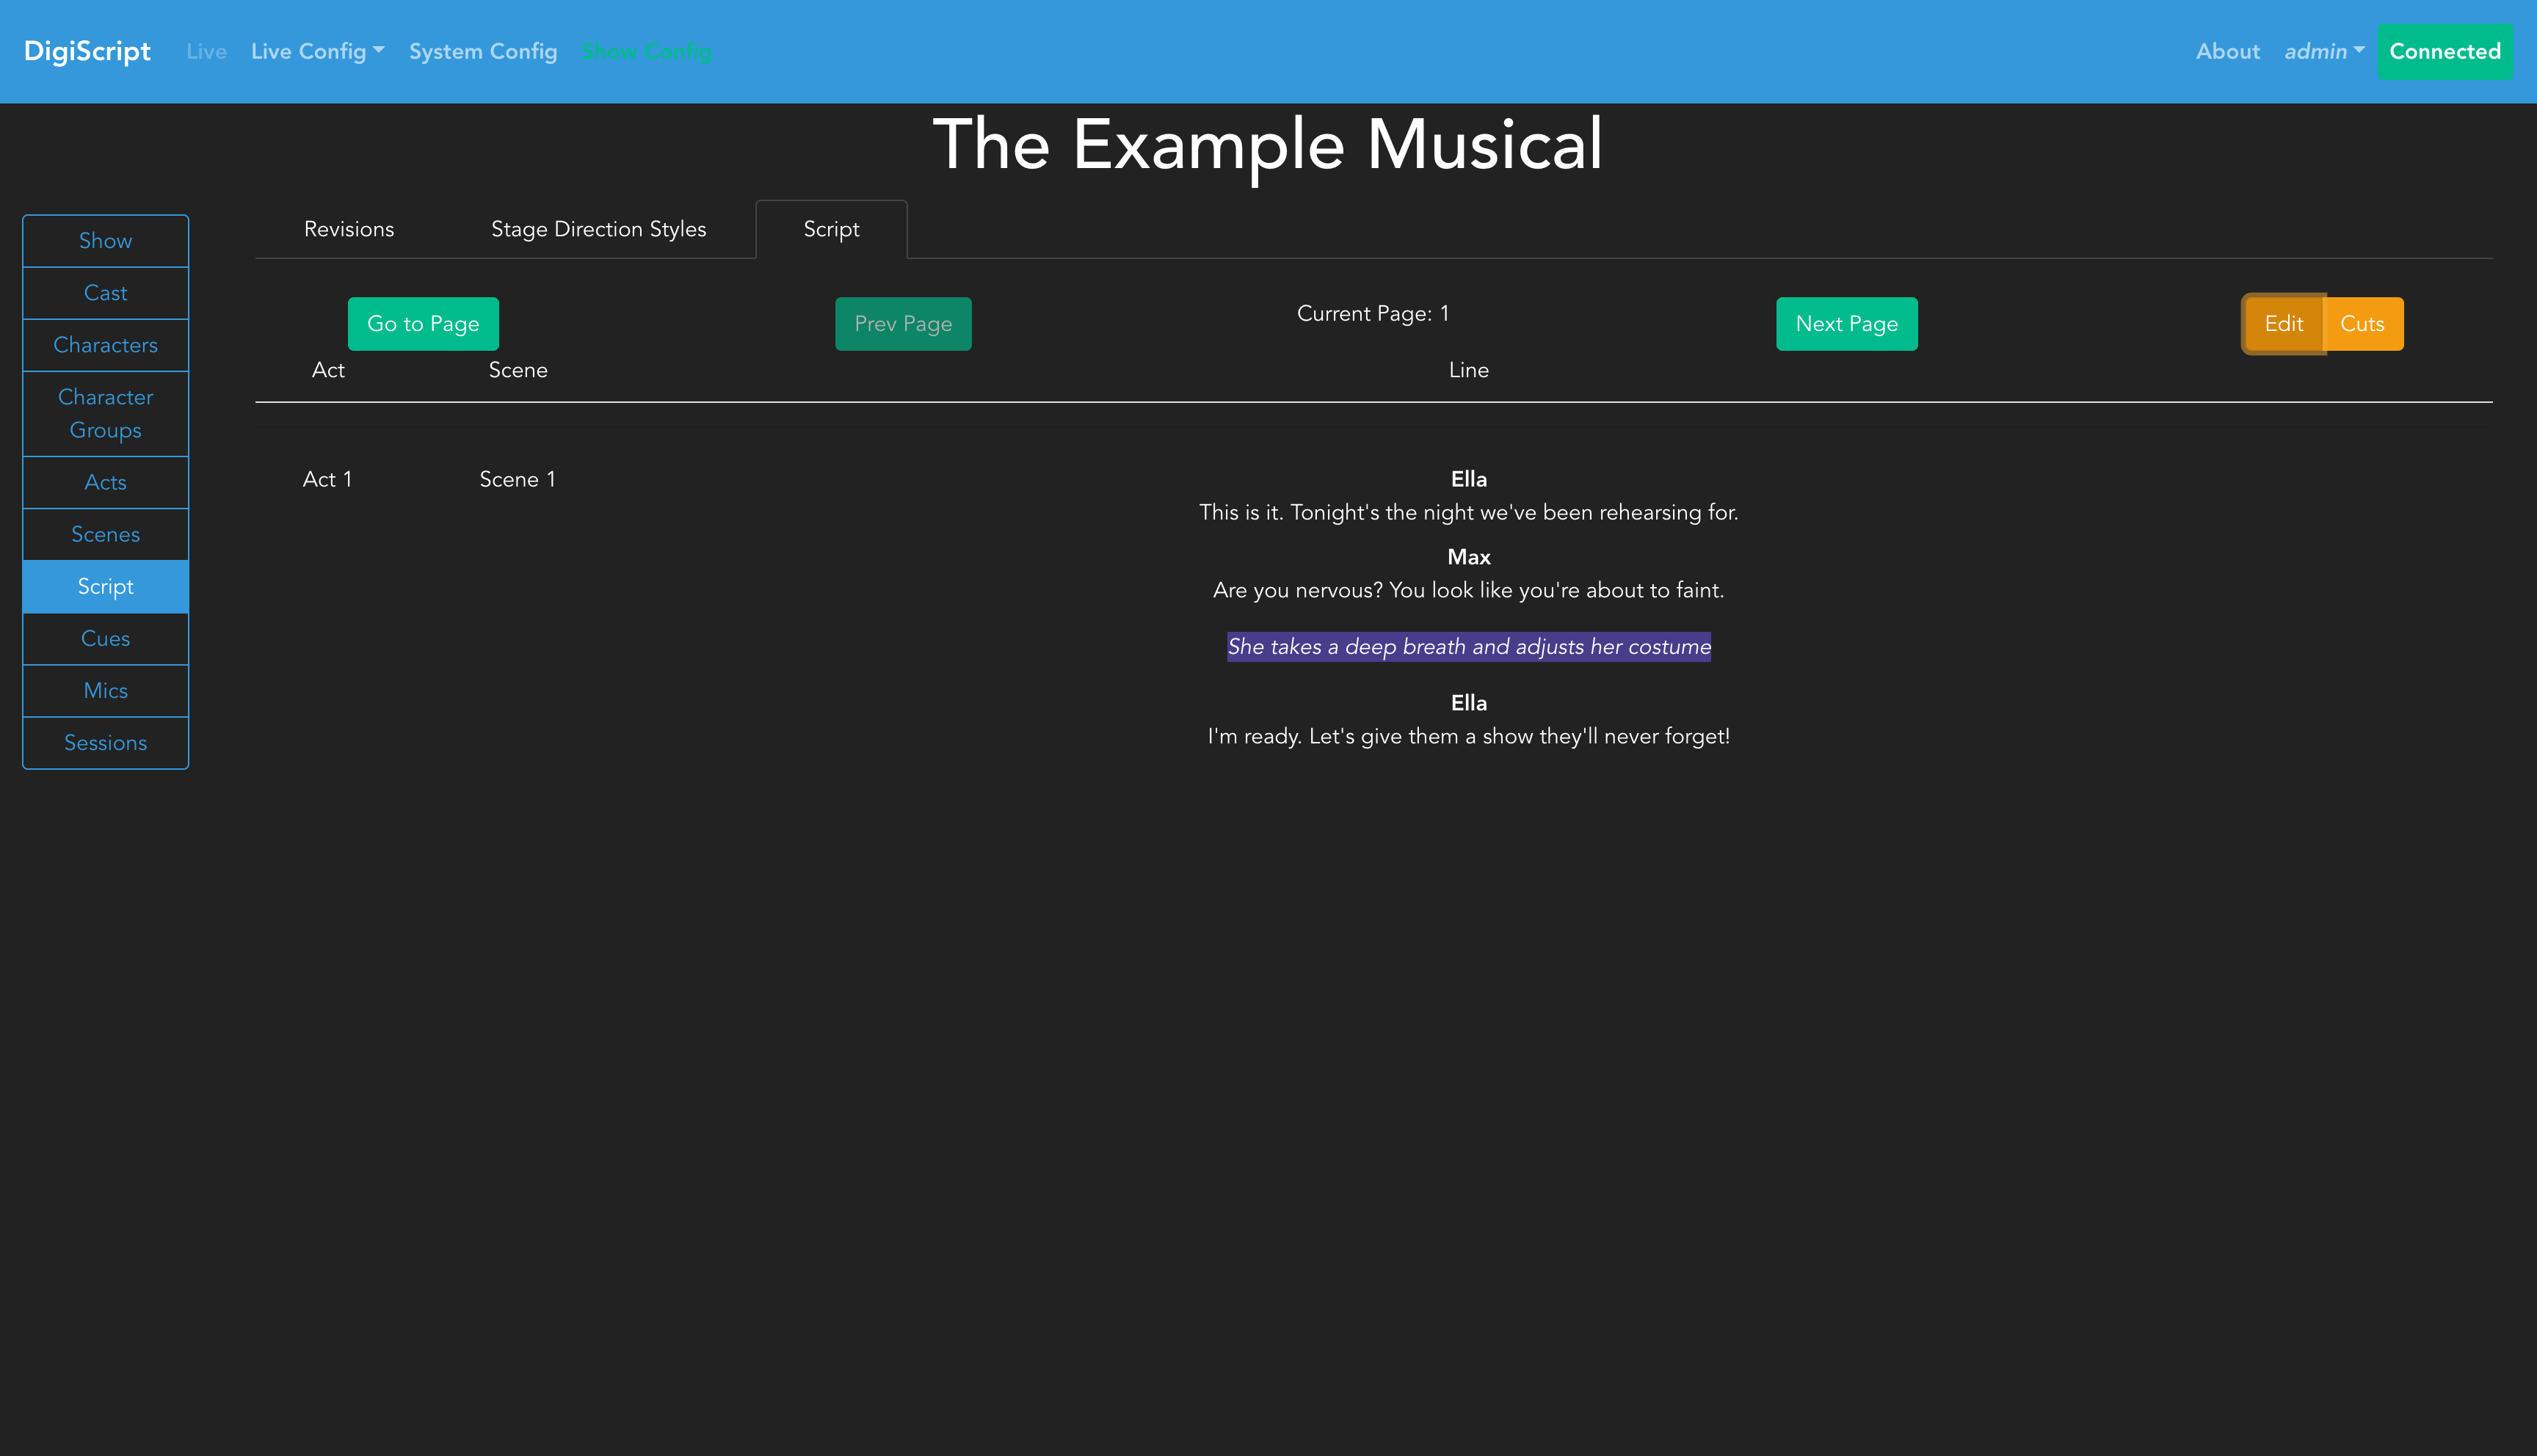
View mode provides a clean reading interface without the editing controls, similar to what you will see during the show.
Once the script has been configured, you can Configure Cues or learn how to run a Live Show.